
I’ve been knitting socks for 13 years, but I have never successfully completed a pair of toe up-socks.
To be more precise, I have never even managed to get the cast-on done right. The last time I tried was in the summer of 2010, when I was studying for the bar exam. In retrospect, that probably wasn’t the best time to try to learn a new skill.
July, however, is the month of socks here on A Bee In The Bonnet, so I decided to do something about this situation.
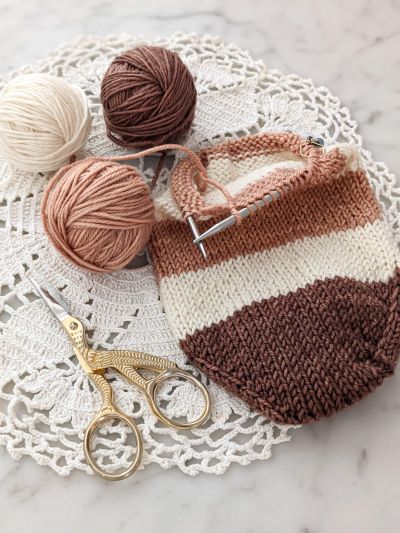
I had some yarn leftover from my three Camellia Fiber Company sock patterns, so I weighed it. They came out to almost 100 grams total–plenty for a pair of socks. I decided to use them to learn to knit scrappy, toe-up socks.
Why Knit Toe-Up Socks Now?
Well, there are three three major factors.
First, I had yarn scraps that were already color coordinating. I’m a sucker for stripey socks with a good color scheme. I knew from putting the other finished socks next to each other that these scraps would be great together in a single sock, too.
Second, the scraps I had were sport-weight, not fingering-weight. That means I would be able to finish more quickly if I found I didn’t enjoy the experience.
Third, well, I’m trying really hard nowadays to tackle the things that frustrate or scare me. Attempting a toe-up cast on was one of the most frustrating experiences of my early knitting life. I couldn’t let that streak go on forever.
And so it was that I found myself sitting at home on Wednesday evening with some spare time on my hands. I decided to cast on. Like any diligent and skilled researcher, I went to Google, and typed in, “cast on for toe-up socks.”
I know. This is some cutting-edge work here.
Learning to Cast On
The first result of my highly technical Google search took me to a video for the Turkish cast-on. The video promised it was suitable for either magic loop or DPNs, but I still couldn’t get the hang of it. This is probably operator error, if I’m honest.
So then I tried again, and this time, I found a video for Judy’s magic cast on. This one, for some reason, clicked. It took a couple tries, and I may have had to rip things out a few times, but I did it. I knit a toe!
Of course, then I was confronted with the problem of how exactly I planned to make the rest of the sock.
Calculating How Many Rows I Needed for My Toe-Up Socks
Thankfully, because I was using the same needles I had used for my other three pairs of socks, I knew my row gauge already. I also knew that the toe, heel, and cuffs would take up about a third of my yarn. I decided to do those parts in one color, and use the other two colors to alternate the stripes.
It took a little bit of math. First, I measured some other socks with a contrasting heel and toe, then compared that to my row gauge. With those numbers, I figured out how many rows total I would need in the foot. Then I divided that total by 4 to figure out how many rows I needed in each stripe.
If you don’t want to get technical, you can skip this part. If you want the math for your own socks, though, here it is.
How to Calculate How Many Rows You’ll Need
- Rows per inch on my toe-up socks: 9
- Length of foot section between end of heel and beginning of toe: 4.5 inches
- Total number of rounds needed: 40. For this part, you multiply your row gauge by the total length of the foot section. 9*4.5 is 40.5. I gently fudged it a bit to get a number that would easily divide by 4 for the stripes.
- Number of stripes in foot: 4
- Number of rounds per stripe: 10
Because of the size of my feet, I knew that the length of the foot section was roughly equivalent to how tall I would want my socks to be, too. I doubled the total amount of rows I would need for each color and weighed my balls of scrap yarn to make sure I had enough.
Everything looked good, so I carried on. I figured the worst that could happen was that I’d have to rip back. Next time, I’ll update you on whether my plans for the color changes worked out accordingly and how that heel turned out. More soon!
Stephanie D
Tuesday 20th of July 2021
Two-at-a-time toe-up socks is the only way I knit socks. No need to count rows ever. Both socks always have the same number of rows, and you can try them on as you go, to decide when it's time to knit the heel. I use the fish lips kiss heel.
Lauren Rad
Wednesday 21st of July 2021
I've heard good things about toe-up TAAT! I still can't seem to get the hang of magic loop, so I think that will be something far in the future (if I ever get the hang of it), but I love seeing others making their socks that way. It's very visually satisfying.
Bonnie bee
Saturday 17th of July 2021
I love doing toe up socks. Judys magic cast on and a fleegle heel are my favorite choices for toe up socks.the best part is being able to try on the socks to check for correct length before starting the toe.
Lauren Rad
Sunday 18th of July 2021
The fleegle heel is my next technique to try! I used my standard wrapless short-row heel on my first pair, which was fine, but I'm interested in adding a few new techniques to my collection.
Elise Hiller
Friday 9th of July 2021
Toe up socks are super fun! Even though I have knit many pairs, I still have to look up how to cast on, but i love watching the sock grow from the bottom up. Glad to see you tackling your knitting fears! BTW - I used your 2020 Socktober pattern to teach a sock class for reluctant sock knitters and they loved the pattern!
Lauren Rad
Saturday 10th of July 2021
I'm so glad they enjoyed the pattern! It's definitely a beginner-friendly design, and I think the round toe is less scary for new sock knitters because there's no grafting. Thanks for the kind note.