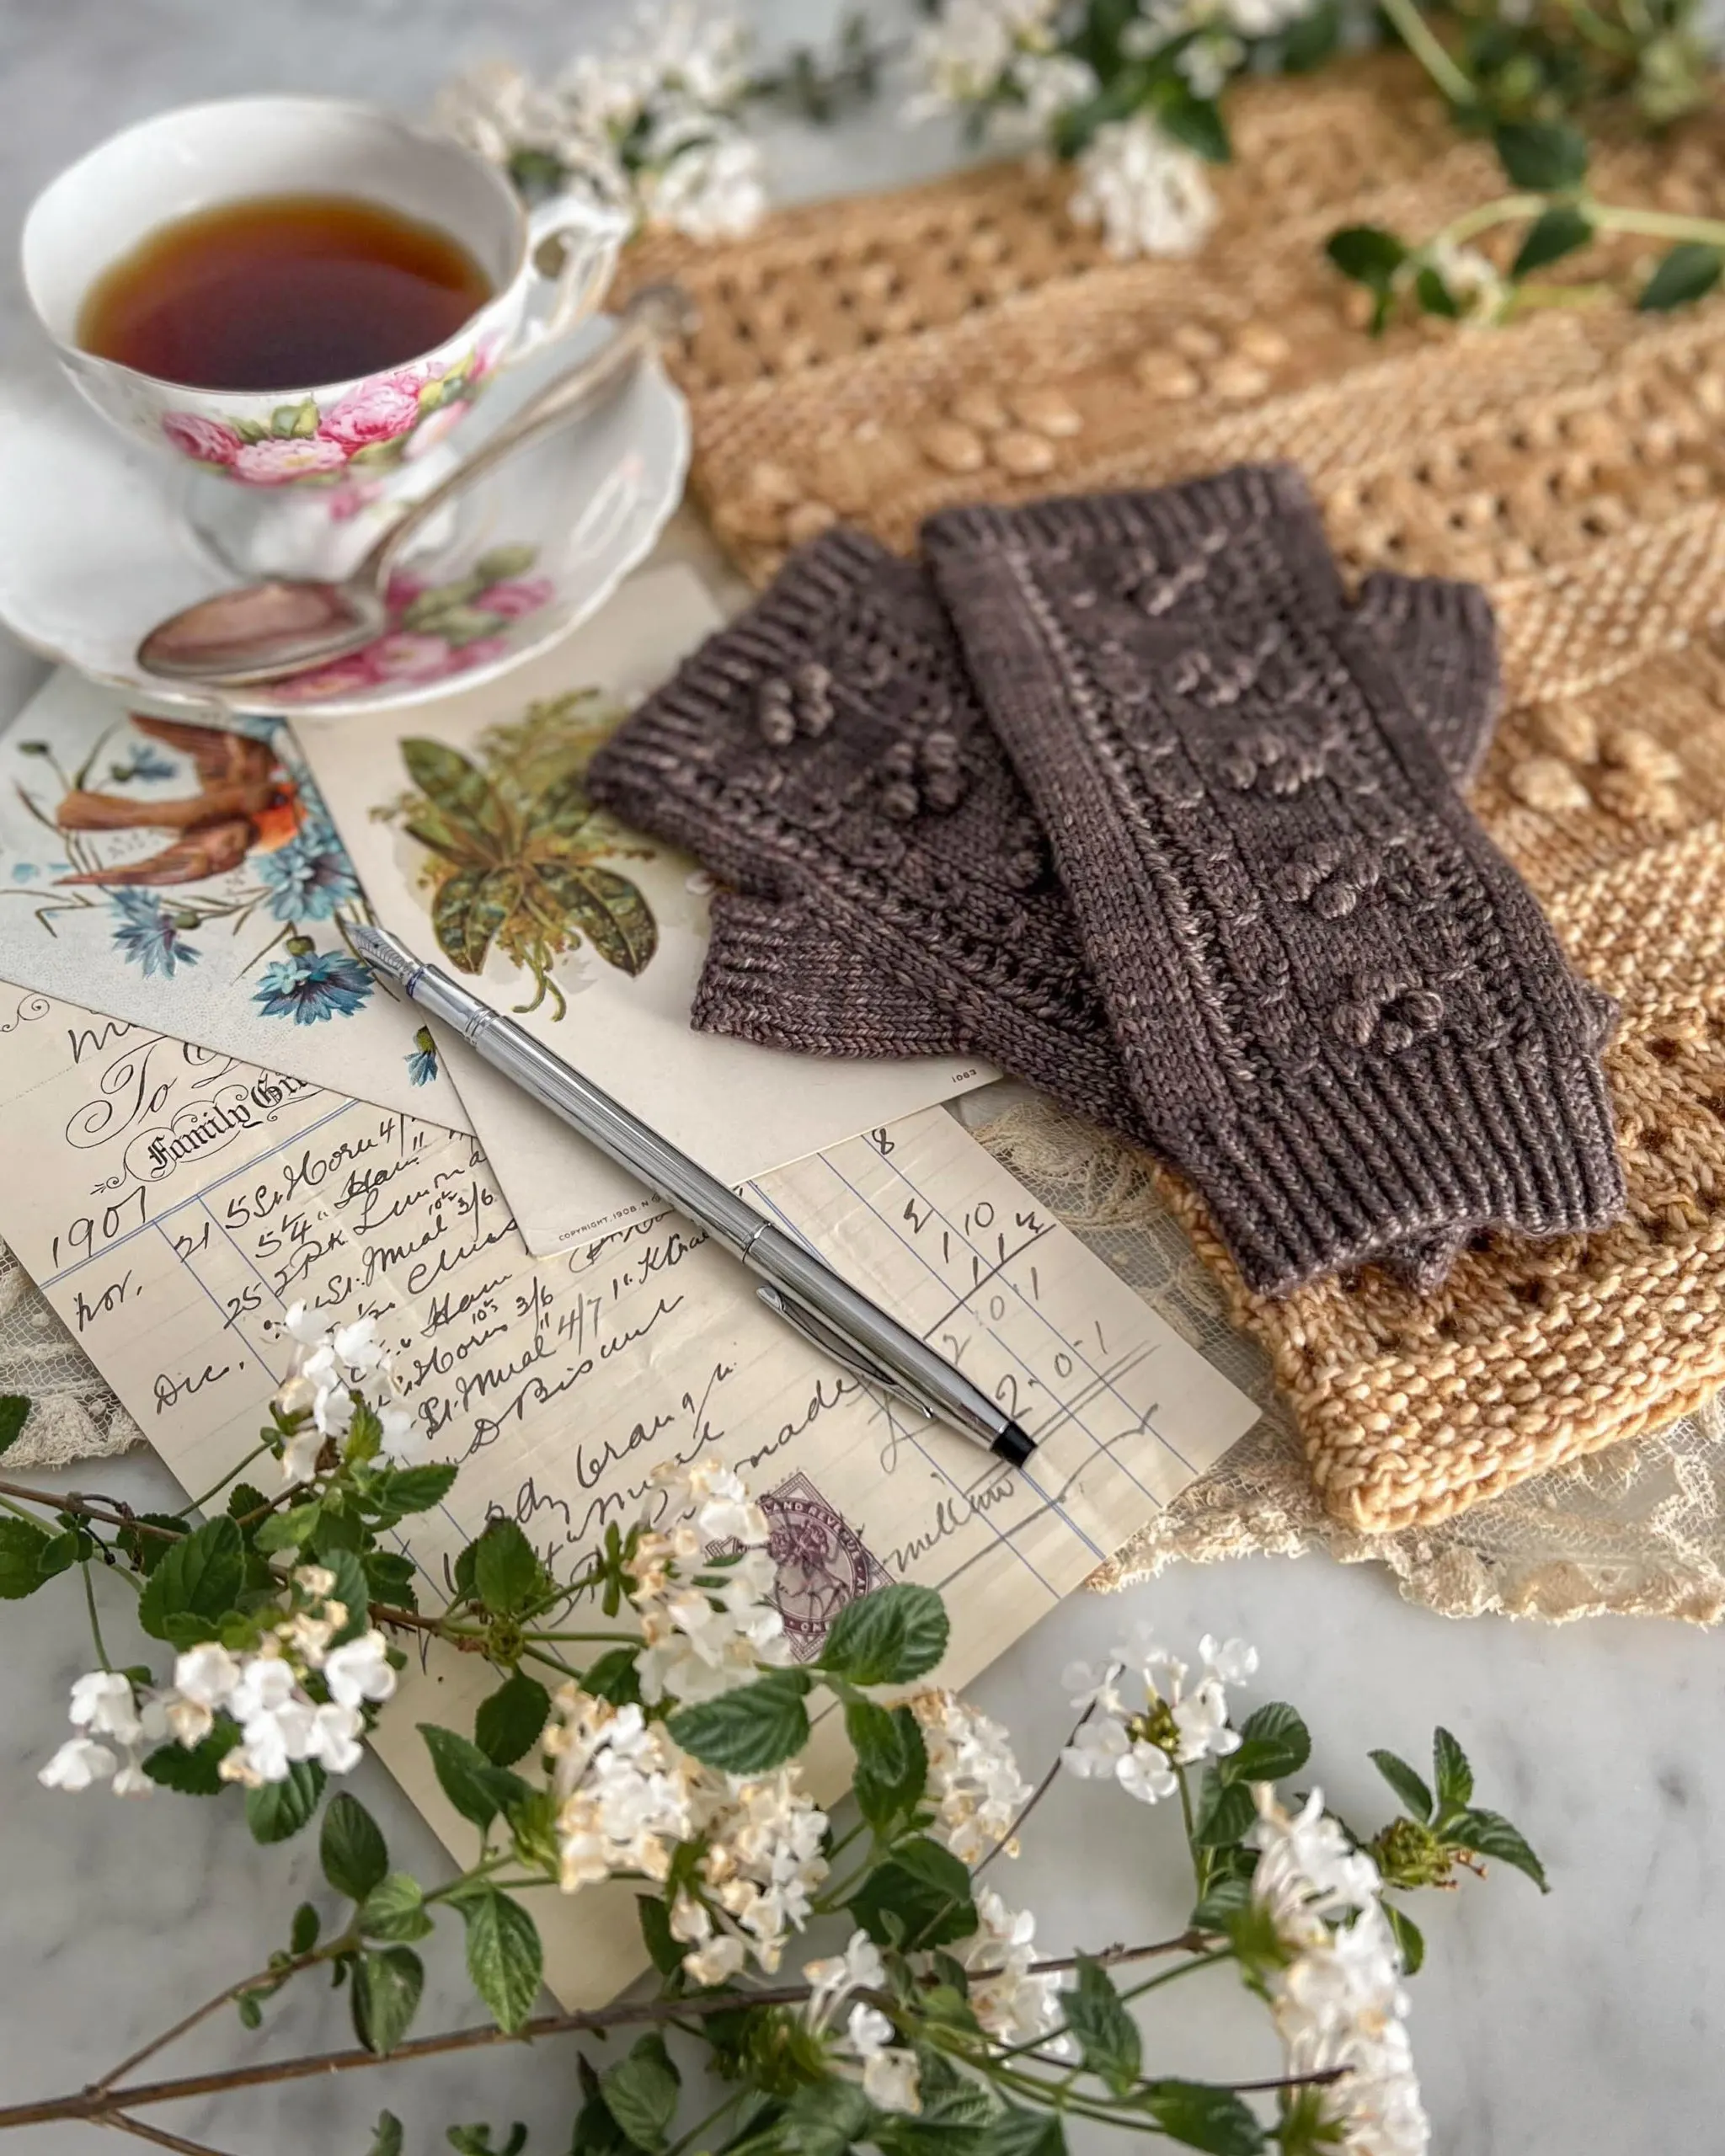
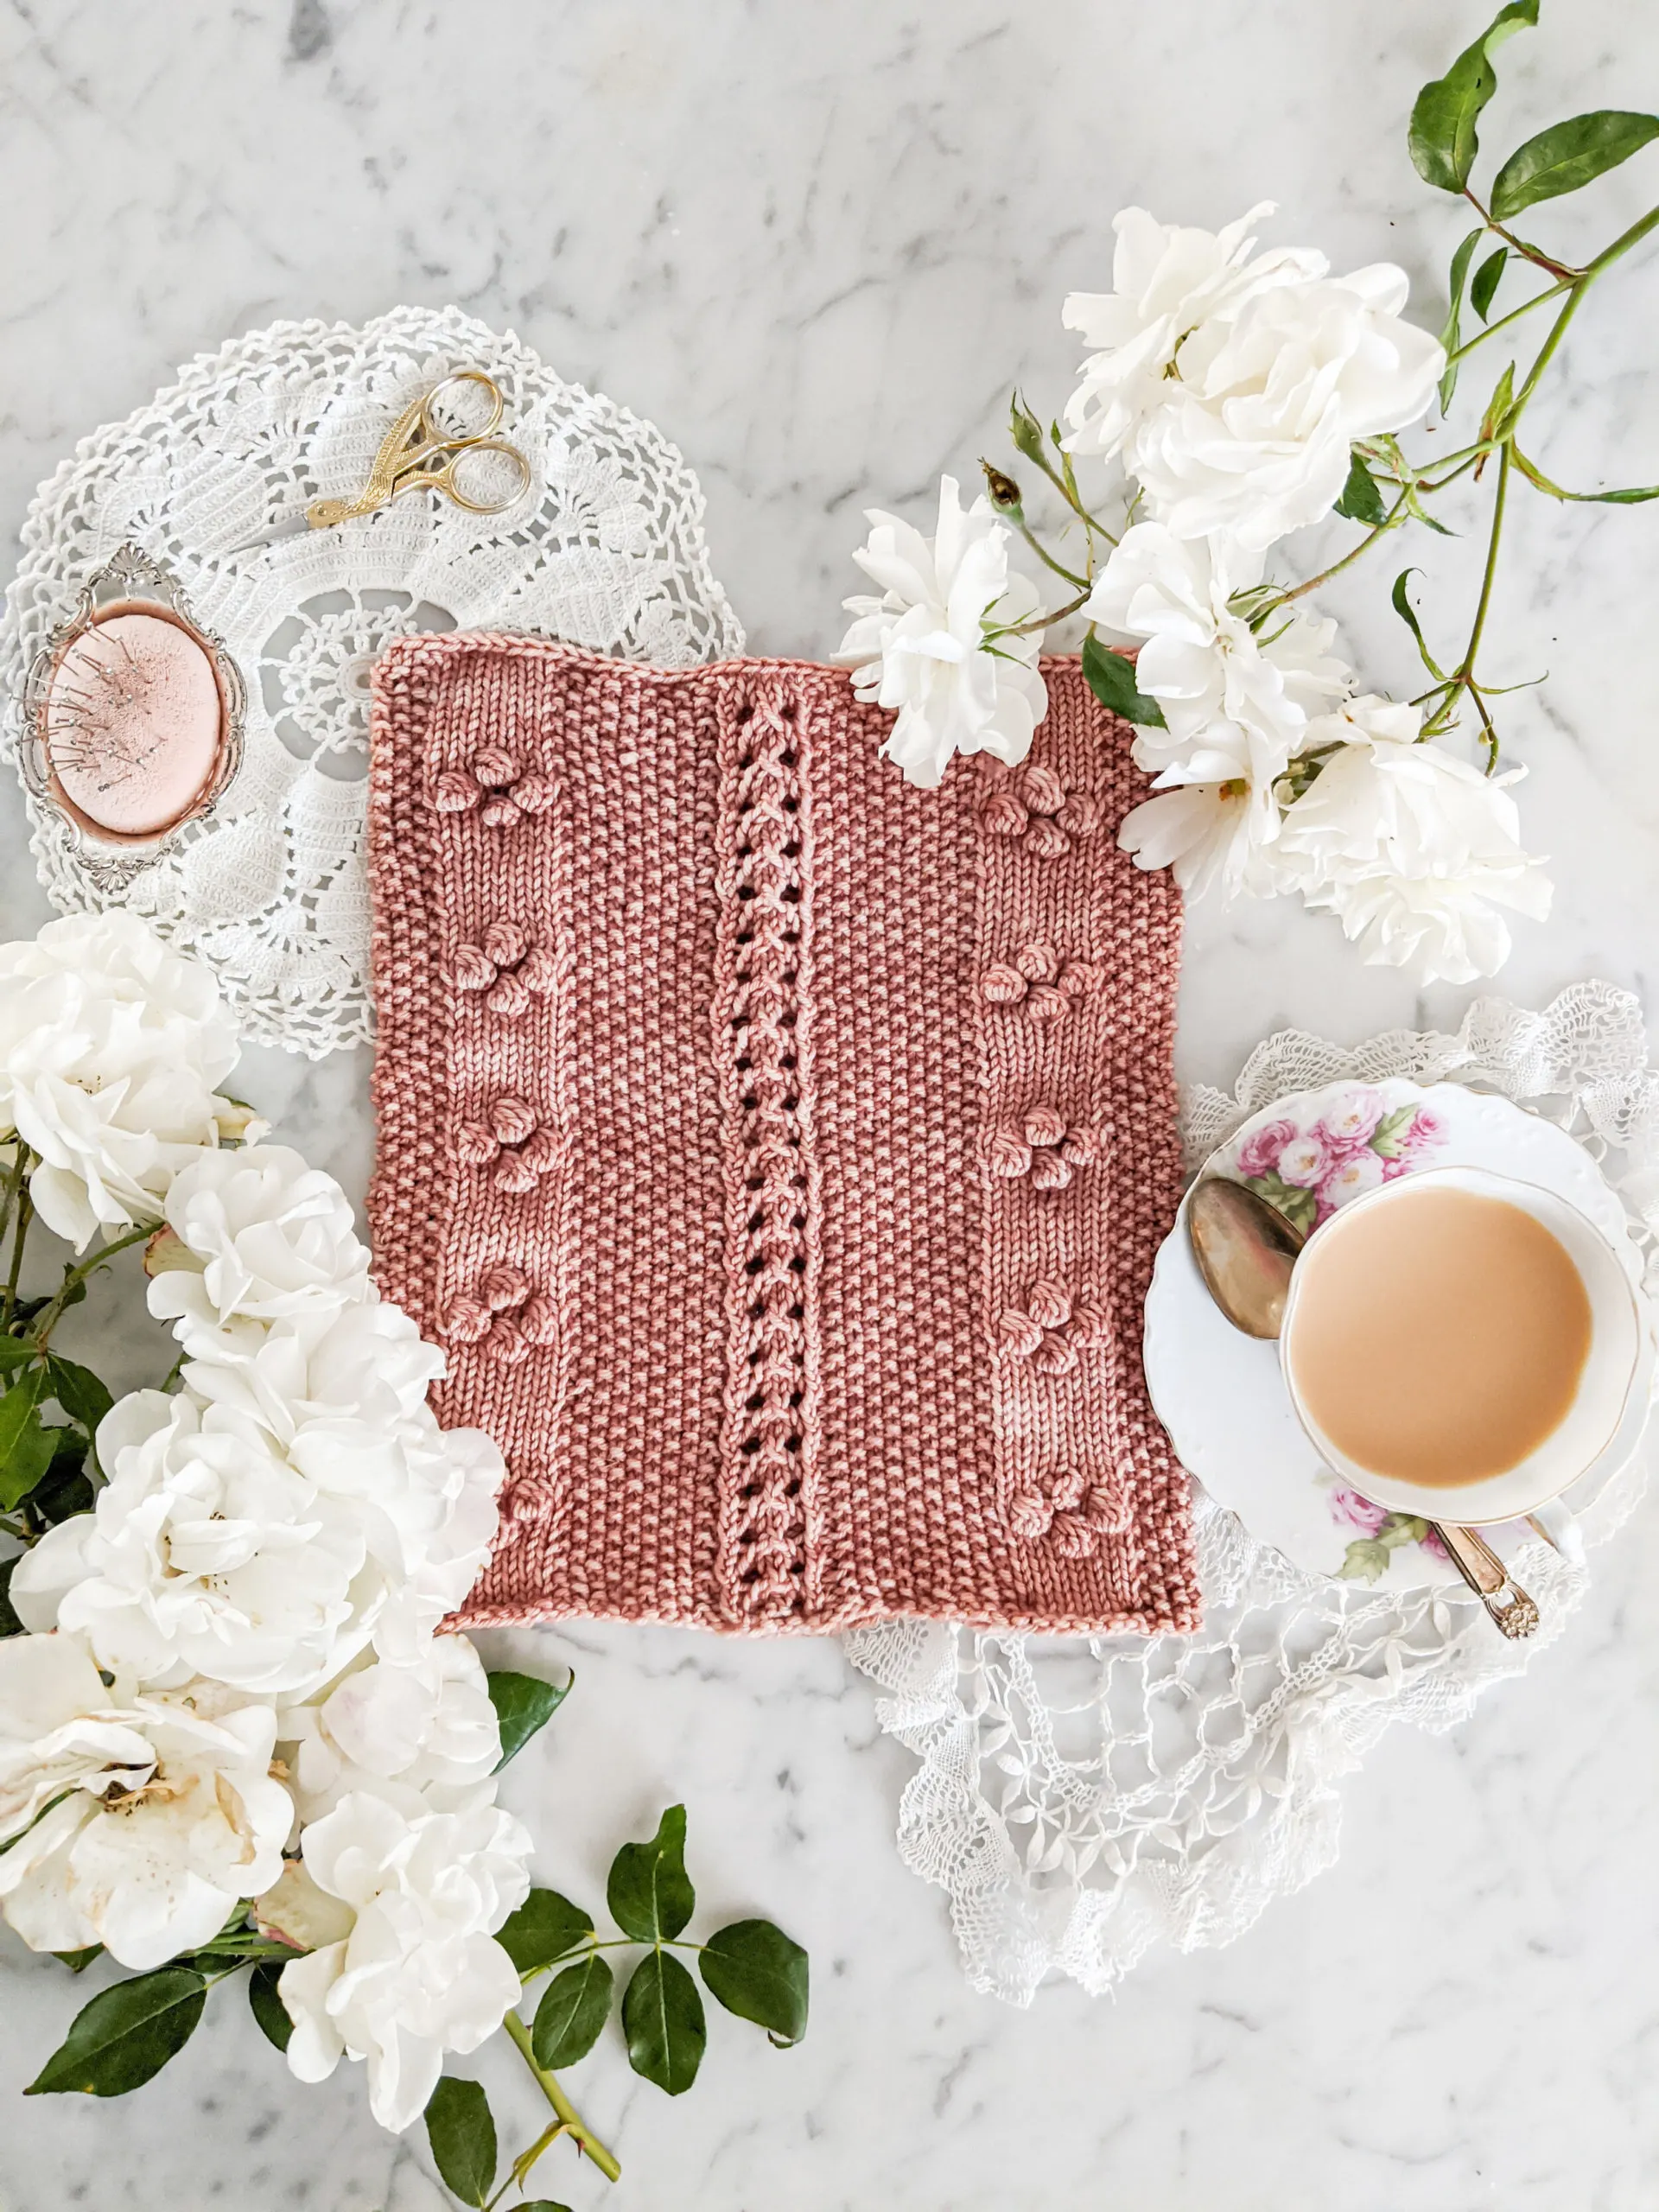
I love bobbles in my knit designs. I use them in cowls and shawls and mitts and wherever else I can put them.

But different bobble techniques result in different bobbles, and it dawned on me that we don’t often discuss the benefits and drawbacks of each method. What’s more, I often see knitters saying they refuse to knit anything with bobbles because bobbles are so much extra work. The thing is, they don’t have to be!
So in today’s blog post, we’re going to look at three different ways to form bobbles, along with why you might choose one over another.
The Traditional Method of Knitting Bobbles
The classic method of knitting a bobble involves a lot of turning your work around. It goes something like this:
- Kfb into the same stitch repeatedly until you have 5 stitches. Turn.
- Purl across all stitches. Turn.
- Knit across all stitches. Turn.
- Purl across all stitches. Turn.
- Knit across all stitches. Turn.
- Insert left needle tip into second stitch from tip of right needle. Pull up and over the stitch to the left. Repeat until only one stitch remains.
- Continue knitting in pattern.
This method is a reliable system that is easy to remember and will work with the needles you’re already using for your project. That means you won’t need any extra tools.
On the other hand, all that flipping your work around can get tedious. What’s more, if your project is on the heavier side, flipping the work can be tiring and can stretch out your project, too.

The Easy Method of Knitting Bobbles Without Turning Your Work
If the traditional method of knitting bobbles annoys you like it does me, try knitting your bobbles without turning your work. It sounds too good to be true, huh? But it works.
- Kfb into the same stitch repeatedly until you have 5 stitches.
- Slip the stitches one by one from the right needle back to the left needle.
- Knit all five stitches.
- Repeat Steps 2 and 3 four more times, for a total of five repeats.
- Insert left needle tip into second stitch from tip of right needle. Pull up and over the stitch to the left. Repeat until only one stitch remains.
- Continue knitting in pattern.
The benefit of this method is that it avoids having to flip your work back and forth several times for each bobble. When you’re working a project with lots of bobbles, like the Pandiculation Cowl, this is a huge time savings.
But there’s a drawback here, too. Based on my experiment, this method produces larger bobbles than the traditional method. If you are trying to keep your bobbles neat and tight, that’s something to consider. You’ll also end up using a little bit more yarn than you would in the traditional method, because each bobble has some floats behind it.
Still, I think the benefit of knitting bobbles without turning your work is worth it.

The Crocheted Method for Adding Bobbles to Knit Projects
Okay, this is where I admit I misled you a little with the title of this blog post. It’s actually two ways to knit bobbles and one way to crochet them. But hear me out!
If you asked me my favorite method for adding bobbles to a knitting project, it would be the crochet method. It seems a little odd to crochet the bobbles in a knit project, but I promise you, it produces the plumpest little bobbles with the best definition. It also avoids the odd gap in the fabric at the back of knit bobbles. Once I learned this method, I never went back.
This is a technique I learned from Hitomi Shida in the Japanese Knitting Stitch Bible (affiliate link, which means if you choose to buy something through this link, I’ll receive a small commission at no extra cost to you), but the instructions are my own.
1. Insert your crochet hook knitwise through the stitch where you will be creating your bobble. Yarn over, draw yarn through, and slide the stitch off the needle.
2. Wrap yarn around hook, insert hook through the same stitch where you will be creating your bobble, yarn over and draw yarn through (3 loops on hook).
3. Repeat step two twice again, for a total of three repeats (7 loops on hook).
4. Yarn over and draw yarn through all 7 loops on your hook.
5. Yarn over and draw yarn through.
6. Insert your hook purlwise through the left leg of the stitch below where you are making your bobble. Yarn over and draw yarn through.
7. Yarn over and draw yarn through all remaining loops on your hook. There will now be one loop left on your hook. Move that loop to your right needle. Your bobble is finished.
The benefit of this method is the incredible definition you get on your bobbles. Unlike the knitted bobbles, which float loosely in the knit fabric, the crocheted bobble is anchored to its base. This helps it pop out more and have a more spherical shape.
Unfortunately, if you’re not comfortable with a crochet hook, this method may feel a little fiddly as you’re getting used to it. Juggling the crochet hook along with the knitting needles can be a bit of a kerfuffle, and of course, you have to make sure not to lose the hook. All of these might be dealbreakers for you.

A Helpful Tip
Bobbles have a tendency to get misshapen, so whatever method you choose, make sure to plump them up after blocking and before the project has dried. I do this by gently squeezing any flattened or leaning bobbles with my fingertips, like I’m picking a blueberry.
Wrapping Up
No matter which method you choose for making your bobbles, one thing is true: bobbles are a fun way to add some texture and visual interest to a knitting project. Whether you cluster them together, use them to send secret messages in morse code, or line them up to create columns and rows, the bobbles will help make your project a little more fun to knit and a little more fun to look at.
Also, if you’d like to knit any of the patterns you’ve seen in this post, those are the Laurel Hat, the Lemon Scone at Home Cowl, and the Rhubarb Crumble Cowl (a free pattern).


I don’t knit bobbles very often. But I think I’d use your first method, and instead of turning the work, I’d knit back backwards! I do that for entrelac, and it’s.a time and energy saver.
The second method is kind of like i-cord, yes?
The second method is very similar to i-cord, except you don’t pull it so tightly together that it creates a tube! You’ll have some yarn floats across the back instead.
I’ve been knitting for 60 years and never heard of the crochet method for a knit project or thought of combining the two. I’ve been crocheting just as long so that will be my go to method from here on in. Thanks so much.
I’m so glad it was helpful for you! These cute little bobbles are so much fun.