I recently realized that I needed another ear warmer in my life. We’ve had unusually cold weather here in Ventura, but I also like to wear my hair up a lot. I decided to knit an ear warmer so that I could keep my ears cozy but still have my hair up in a bun if I wanted.

So first, I fooled around with a few ideas. I looked at some designs already out there, looked at my own pile of socks, and had a lightbulb moment. I could use somebody else’s pattern, or I could make something that is a little more personalized.
You know me. I went with the latter.
When I realized how super easy this is, I decided I had to write up a blog post for you all. If you already own a sock pattern, you also already own the building blocks for your own cozy ear warmer. If you want to turn this into an easy headband instead, you can just change the positioning when you wear it or, if needed, cast on fewer stitches for a narrower headband.
A quick note about skill level: although the actual mechanics of this headband can be pretty straightforward, following this tutorial requires a decent amount of knowledge about how to adapt knitting patterns and how knit accessories are structured. It’s not intended for the beginning knitter.
If, however, you’re an adventurous beginner knitter who wants to learn some new skills and isn’t afraid to fix the occasional mistake, come on in. The water’s great.
To knit an ear warmer or headband, first choose your yarn
Because you are going to be wearing this close to some pretty delicate skin, you want to choose a yarn that is nice and soft. I wouldn’t recommend a really rustic wool for this project.
Instead, choose a yarn that will feel good against your cheeks. Your ear warmer will probably end up touching your cheeks and neck more than you expect.
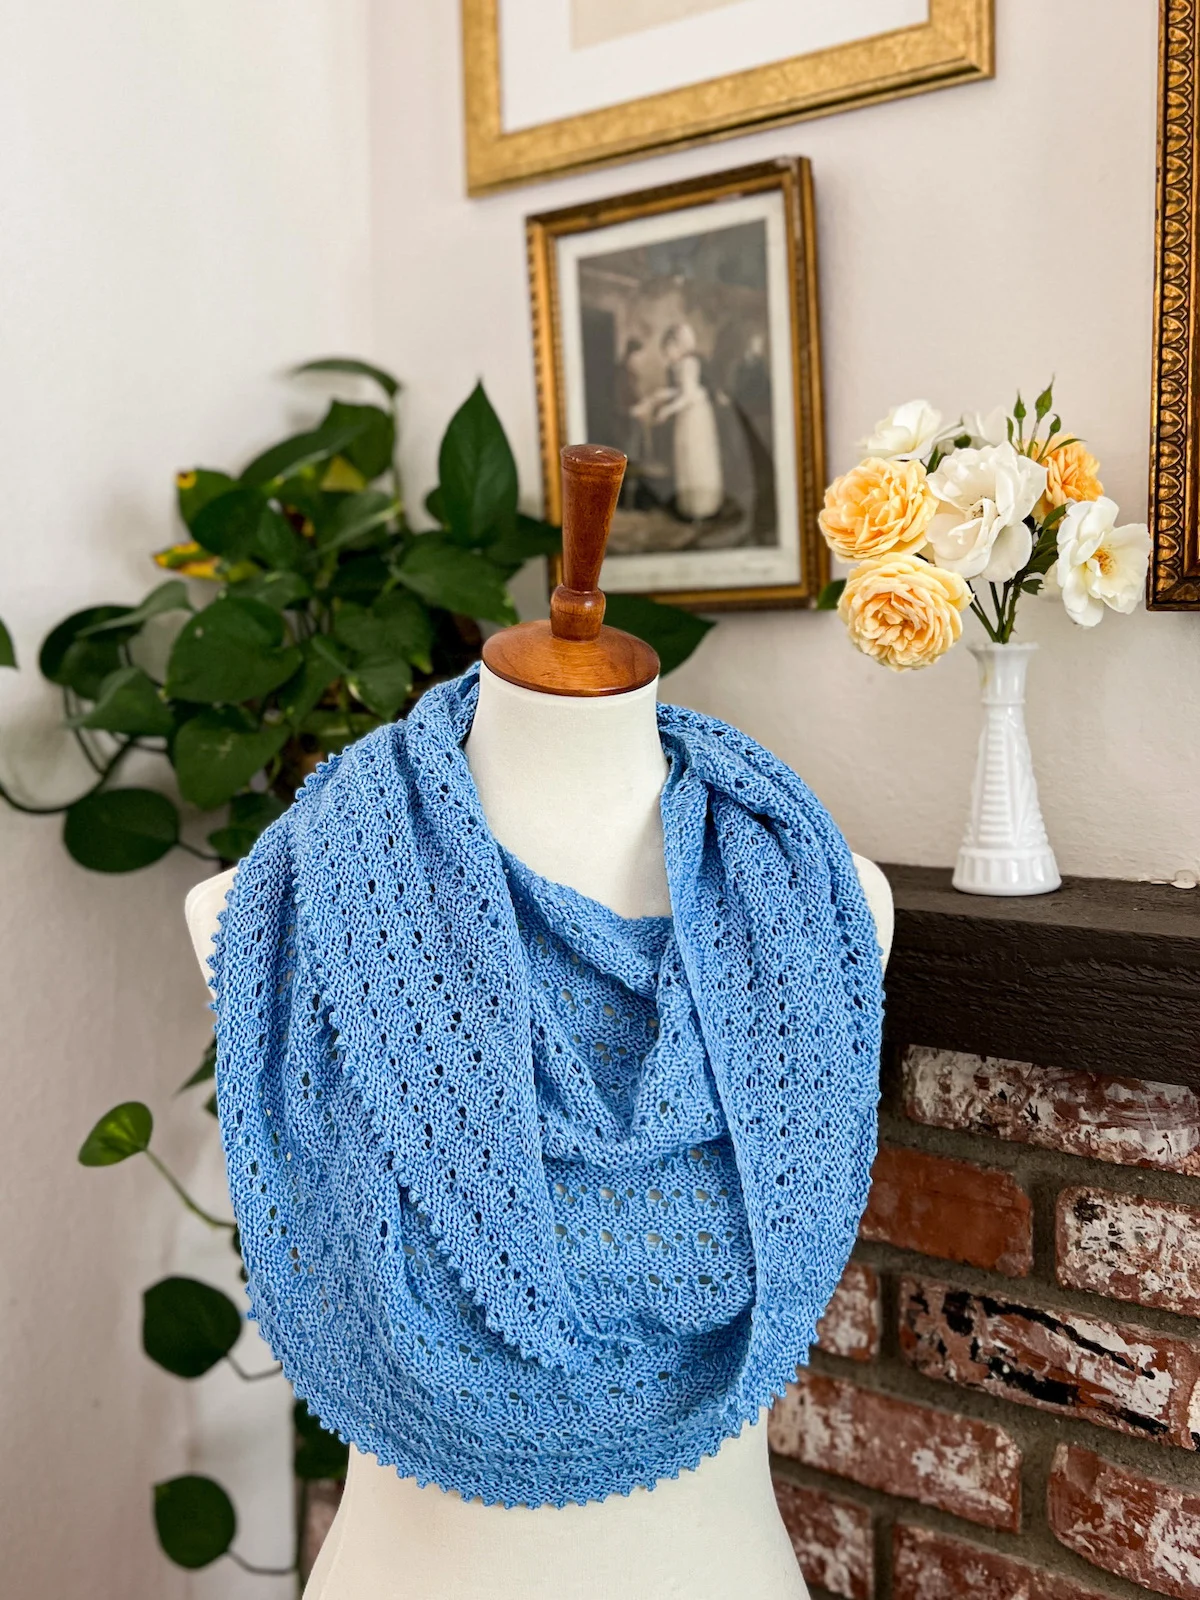
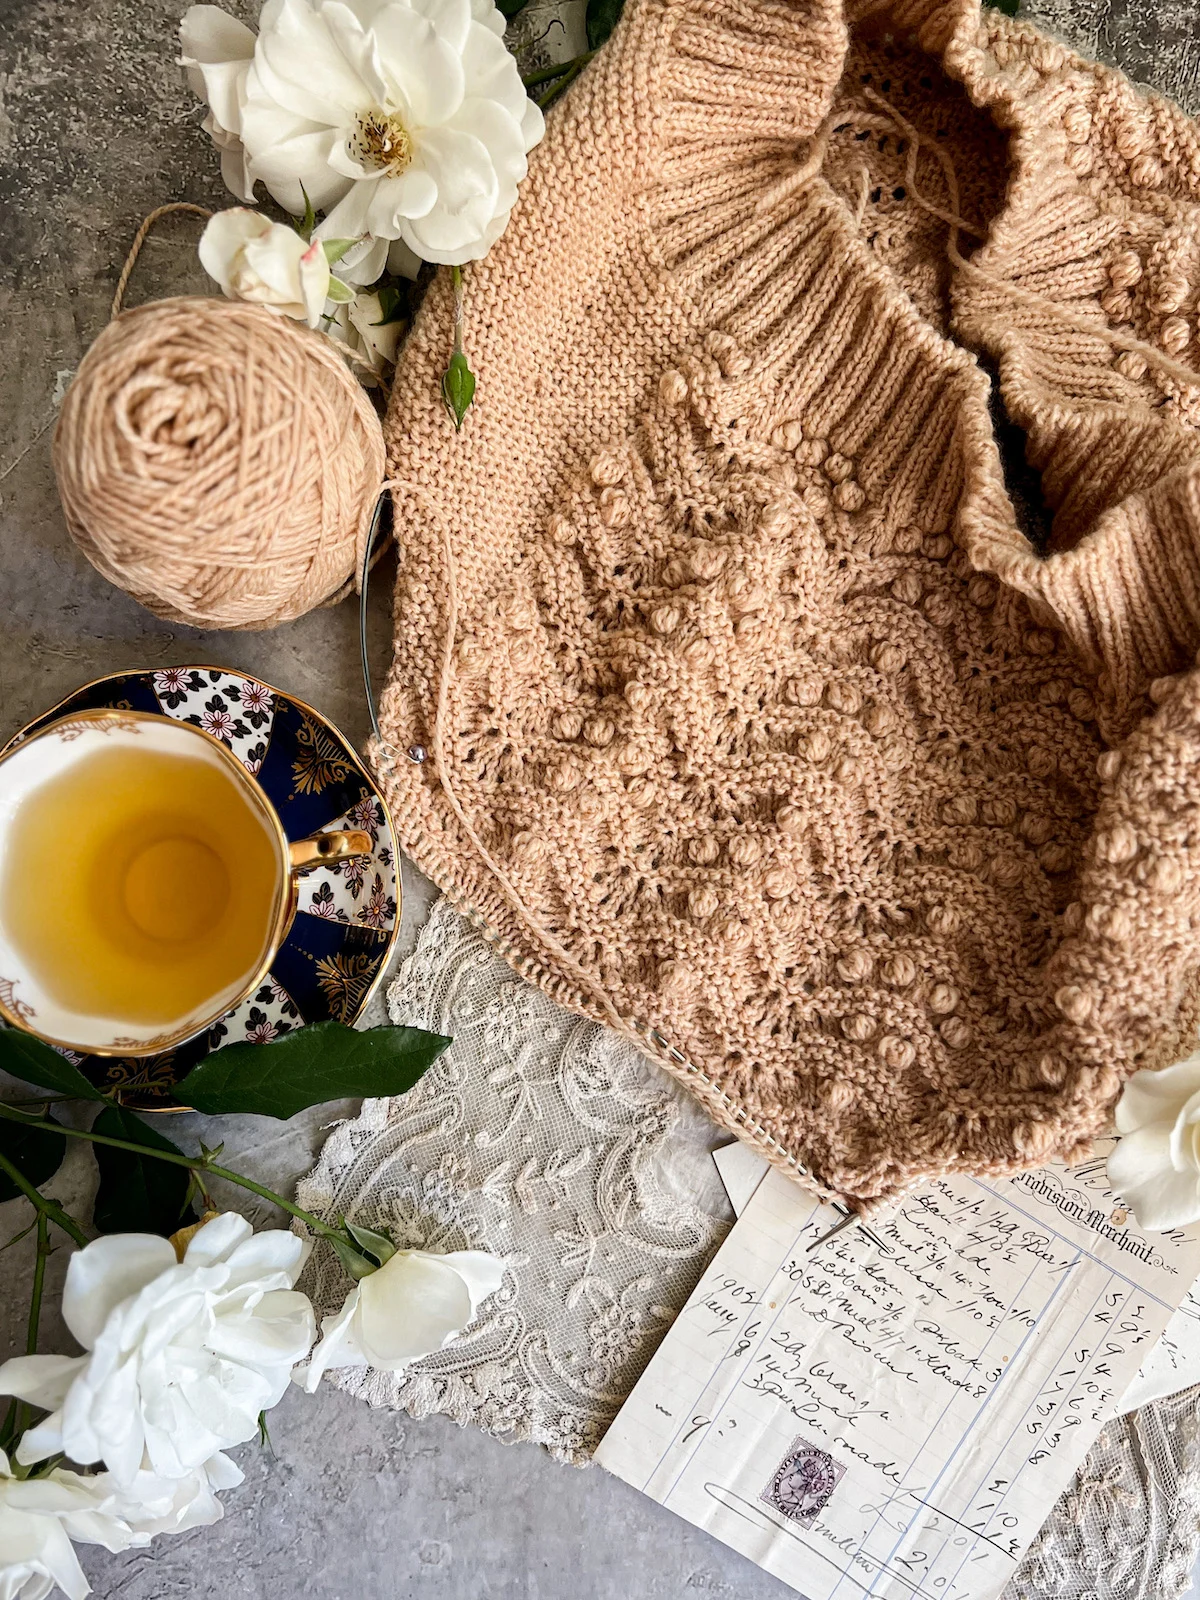
For my project, I used a wonderful merino-cashmere blend that I bought from Blu Fiber Company almost 3 years ago. I used most of the yarn to make myself a pretty little sweater, but I had enough left over that I knew I wanted to make something else special with it.
Because most sock patterns are knit for pretty fine yarn, this knit headband is not going to be a quick knit with super bulky weight yarn. You’ll probably be using a fingering-weight yarn or using math skills to adapt a sock pattern for use with a slightly thicker yarn weight. I would not try this with anything thicker than a worsted weight yarn.
When choosing your yarn, make sure you have at least enough to knit a pair of socks. Your ear warmer will have to wrap all the way around your head, which is about as long as two pairs of adult socks, give or take. This means it’ll use up a lot of yarn, and unless you’re doing stranded colorwork, this probably isn’t a great project for using up leftover yarn.
After you choose your yarn, choose a pattern
Your next step is to choose a pattern. If you only have one sock pattern, the choice is easy. If you have others, though, pick one with a design that will fill most of the top half of a tube. This is a great way to get more use out of a pattern you already have or to try something new that you’ve been kicking around in your head.
For my ear warmer, I used the stitch pattern for my Crème Brûlée Socks, which I also used on the Arroyo Verde Mitts. What can I say? I like a matching set.
The thing I liked about this stitch pattern is that it’s designed to be knit in front and back panels down the sock. Because the backside won’t be visible when it’s worked as an ear warmer, I only worked the front panel and knit the back panel.
But really, you can make this project even with just a plain stockinette tube. With that method, you can crank out simple headbands for everybody on your gift knitting list, too. I would not recommend doing this project using garter stitch, though, because garter stitch has a lot of vertical stretch. It’ll be too easy for the headband to stretch out and become too lose to wear.

Now the fun part: knit a long tube
If you’ve been here a while, you might notice I skipped a step I’m usually super enthusiastic about. That’s right: I didn’t tell you to make a gauge swatch. That’s because, if you’ve already knit the socks and you’re using the same needles with similar yarn, you’ve got a good enough gauge swatch.
To start, if you’re making an ear warmer or wide headband, cast on the same number of stitches that the sock pattern recommends. You can use any cast on you’d like. Unlike some headband patterns, you don’t need to use a provisional cast on, because you won’t be grafting your ends together. I used the long-tail cast-on method for mine.
Most of my sock patterns have a range of sizes, so you can make your ear warmer wider or narrower. I did mine with 60 stitches, which comes out to about 7.5 inches in circumference or just shy of 4 inches wide.
Skip the ribbing part. You can knit a few rounds in plain stockinette if you want, but the ribbing will just make your headband a little lumpy and be extra work that you don’t need to do.
Then start working in pattern across the first half of the stitches in your tube and using plain knit stitches for the second half. You’re going to do this for a long time. Like, a long time. A loooooooong time.
Every now and then, measure your tube by gently wrapping it around your head. You want to get the tube long enough that it wraps around your head and over your ears, and is at the length where when you touch the tips to each other, it is just slightly too tight. It should feel a little uncomfortable at this point.
If you’re knitting this as a gift for somebody far away and can’t measure it around their head, ask them to take a tape measure and measure their head circumference. Then, when you’re knitting, knit until the tube is slightly shorter than that measurement.
Once your tube is long enough, bind off and break the yarn, leaving a long tail for sewing the ends together.
When you finish the tube, seam the ends together
Now this part gets a little tricky. Because it’s pretty hard to explain everything via written instructions, I’ve made a video tutorial for you, too.
Essentially, you are going to fold your ear warmer or knitted headband in half so that the two ends (cast on and bind off) are against each other, the patterned portion is facing itself, and the plain stitches (the wrong side) are wrapping around on the outside.
Then, you need to fold each of the two tips in half. One of those tips will be folded so the right side faced inward, and one will be folded so the right side faces outward. Sandwich them together with the sides alternating.
Now it’s time to seam the ends together. First, tuck the loose end from your cast on edge into the inside of the tube. Then, using a darning needle or tapestry needle and the long end of the yarn leftover from binding off, you’ll seam along the edges of the two ends of the tube as they’re folded together. After you finish seaming, flip the headband so that the seam is on the inside and the textured stitches (the right side) are on the outside again.
Like I said, the tutorial video is probably easier. Here you go.https://youtube.com/shorts/mN5a6jnrTpU
If you’re knitting a skinny headband, you should pay extra attention to making sure your ends are carefully matched up when you work the seams and that your seam stitches are small as can be. You’ll have less bulk at the seam to hide any issues compared to if you were knitting a wider headband.
Soak your ear warmer in lukewarm water
I know, I know. People don’t like to block stuff. But the thing is, your ear warmer is going to need to be washed.
When you put it on, it’s going to rub against make up on your face. If you don’t wear make up, it’s still going to rub against your naturally produced face oils and hair oils. If you have any hair product, that’s gonna get on your ear warmer, too. You’ll need to wash the thing.

And that means that you should set it up for success by first giving it a good soak in lukewarm water, gently squeezing out the excess water, and laying it flat to dry. During this drying process, you should take the opportunity to shape your ear warmer a little bit.
If your ear warmer has lacy stitches in it, this is extra important. You will want to make sure those stitches have been opened out nicely so that people can actually see your hard work when you wear your ear warmer. After all, what’s the point in having the most fabulous winter accessories if their beautiful details aren’t visible?
Finally, blocking your ear warmer will give it a professional finish. It’s nice to show off our handknits in their best light.
Show off your fabulous knit ear warmer
After your ear warmer has dried, you can wear it anytime and anywhere. I mean, I might advise against wearing it under a bike helmet or something like that, but otherwise, you’re good to go. If you like to wear long hair in a ponytail or messy bun, this is a great way to stick to your preferred hair style but still keep your ears warm.

You can dress it up or dress it down, and you can make one in every color of the rainbow. This one is a soft pink, but you better believe there’s a purple one already on my needles and about twelve more ear warmers planned for the future.
Easy Shopping List
If you’d like to make a version of this easy project yourself using some of the same materials I did, here is a list of links to some of the things I’ve used. Some of these are affiliate links, which means if you choose to buy something through those links, I’ll receive a small commission at no extra cost to you. I will always identify affiliate links for you. Thanks for supporting my work!
ChiaoGoo 9″ circular knitting needle (affiliate link) (these are my favorite knitting needles for making socks and other small circumference things)
Clover tapestry needle (affiliate link) (this is my all-time favorite needle for wearing in ends)
Stitch markers (affiliate link)
Let’s stay connected!
Join my newsletter for 30% off all new releases, regular updates with helpful tips and tricks, first crack at registration for upcoming workshops, exclusive discounts, and more.
I’m on YouTube now and would love to have you join me there for regular project updates, technique tips, chats about goings-on in the knitting world, and more.
Prefer to read without ads? Join my Patreon, which starts at just $1 a month!
Join the A Bee In The Bonnet Facebook Group to participate in knitalongs and other fun community events
Come hang out with me on the A Bee In The Bonnet TikTok
Follow along on the A Bee In The Bonnet Instagram
Get inspired via the A Bee In The Bonnet Pinterest


Love this idea! Especially since the ends are sewn rather than grafted!
Oh yes, grafting would be terribly tedious in something like this! The sewn end is so much faster.
Thank you! Especially the video.
I am always adapting patterns (and recipes)
And I make lots of socks! This is perfect.
The video really helped me to understand.
My daughter will be getting one for Christmas
Thank you for sharing.
I’m so glad this was helpful for you! Hope your daughter enjoys her headband.