When I first started work on my Mitered Square Blanket of Doom, the goal was to use up all of the many leftovers from the pairs of socks that I had knit over the years. There was just one problem.

As I worked on the blanket, I also kept knitting pairs of socks. That meant I added more leftovers to the basket as quickly as I used them up. Maybe even quicker. Let’s not look too closely at those details.
The long and short of it is, when I finished my blanket, I still had a ton of leftovers. The larger leftovers, 30 g and above, are pretty easy to figure out projects for. But I also had a bunch of itty-bitty leftovers. These were mostly little balls of fingering weight yarn in weights of 3 to 5 g. They were trickier to use up than the larger balls were.
So I decided to try something new. I took all the tiny little scraps, and I turned them into a great big ball of yarn. Then I held them double with a thicker strand of yarn and knitted them up into a simple, seed stitch scarf. The second strand of yarn provided some continuity throughout the entire scarf so that the stripes didn’t feel quite so stark. It also made the scarf knit up more quickly.
Once I finished, I thought it might be nice to turn this into a free tutorial for you. This is a very simple project that is well suited to beginner knitters. It can also be a fun way for more experienced knitters to use up all of their scraps.
Depending on the type of scraps you have, you may be looking for other kinds of projects. I also have a free hat pattern that is great for using up larger amounts of leftover fingering-weight yarn and a full tutorial for how to knit your own mitered square blanket. If you’re looking for something smaller, this free pattern for fingerless mitts is also a great way to use up leftovers, especially if you use one color for the ribbing on the cuff, thumb, and fingertips And another color for the rest of the mitts. You could even stripe two different colors for the main part of the mitts.
Okay, let’s get started with what I used first. Then I’ll give you a step-by-step explanation for how to do everything.

Materials for the Scrappy Seed Stitch Scarf
As I mentioned before, I used leftover fingering weight yarn held together with a thicker strand of yarn. I would recommend keeping your segments of fingering weight yarn to no larger than about 5 g. Otherwise, you’re going to get some very thick stripes instead of the softly chaotic look of this scarf. If you are looking for some color blocking, though, larger amounts of yarn could work.
I took all of my little bits of fingering weight yarn and tied them together using the magic knot method. If you have never used the magic knot method, here’s a video I made that will walk you through it (and all the other steps in making this scarf, too!):
There are some caveats for using the magic knot, however. Like any knot, it can come undone. Although you have the tension of the two different knots straining against each other in this method that provides a little more stability, no knot is perfect. If you would prefer, you can also just join all of your balls together using the clasped weft join, which is a little more secure. The drawback to it is that you will get patches of varying thickness in your project because of the spots where you have double strands of yarn. It’s up to you, your risk tolerance, and how much heavy use the finished object will receive. I would not recommend using magic knot with slippery yarns, including superwash wool.
As I mentioned, I held this yarn double with another strand of yarn. This is where I have a confession. I got a little bit bougie with this project. You see, for my birthday back in January, some dear family members sent me a gift certificate to Webs. I splashed out on some gorgeous, worsted-weight, 95% cashmere, 5% Merino yarn. It is squishy and luscious and magnificent. You obviously do not have to use the same yarn. Any worsted-weight yarn held double with your scraps will do.
I used about 600 yards of the worsted weight yarn and another 600 yards of the fingering weight yarn. For needles, I used a set of 16 inch circular needles in US size 10. You can, of course, knit these on straight needles, but I find circulars are comfortable to work with.

How to knit the scarf
Once you have gathered up your yarn, hold one strand of fingering weight yarn and one strand of worsted yarn together. Using your preferred cast-on method, cast on an odd number of stitches.
I used 35 stitches for my scarf. On the needles I used, with my particular yarn, that led to a gauge of 15 stitches and 24 rows per 4 inches (10 cm), which got me a scarf of 9.25″ (23 cm) wide and 108″ (274 cm) long. Because this is such a flexible project, you can easily make it wider or narrower and longer or shorter by casting on more or fewer stitches and working more or fewer rows. Your personal gauge will also affect the size of your project, so if you are concerned, check your gauge beforehand by knitting a gauge swatch.
Row one and each row afterward: *K1, P1; repeat from * until one stitch remains, K1.
Continue working the same row over and over and over again until your scarf reaches the desired length. Then bind off. Weave in all your ends, soak your project in lukewarm water, gently squeeze out, and lay flat to dry.
That’s it! We art of the scarf really is in the color selection and width of the color stripes, not so much in the knitting technique.

Tips for choosing colors for your scarf
For a harmonious scarf, try to keep your yarns similarly saturated or desaturated. In other words, if you have a lot of really vibrant yarns, you probably don’t want to throw in a soft pastel in a random spot. Likewise, if your scarf has mostly soft pastels, adding a strong red will make the scarf feel imbalanced.
Once you have chosen the various fingering-weight yarns from your scarf, think about how you want the worsted-weight yarn to interact with those yarns. If you have lots of blue fingering-weight yarns, you could choose a blue worsted-weight yarn to give the scarf a more solid look. You could also go with a gray to give it a softly marled effect or a black yarn if you really wanted something dramatic. A white yarn, like the one I’ve used in my scarf, would soften the overall effect.
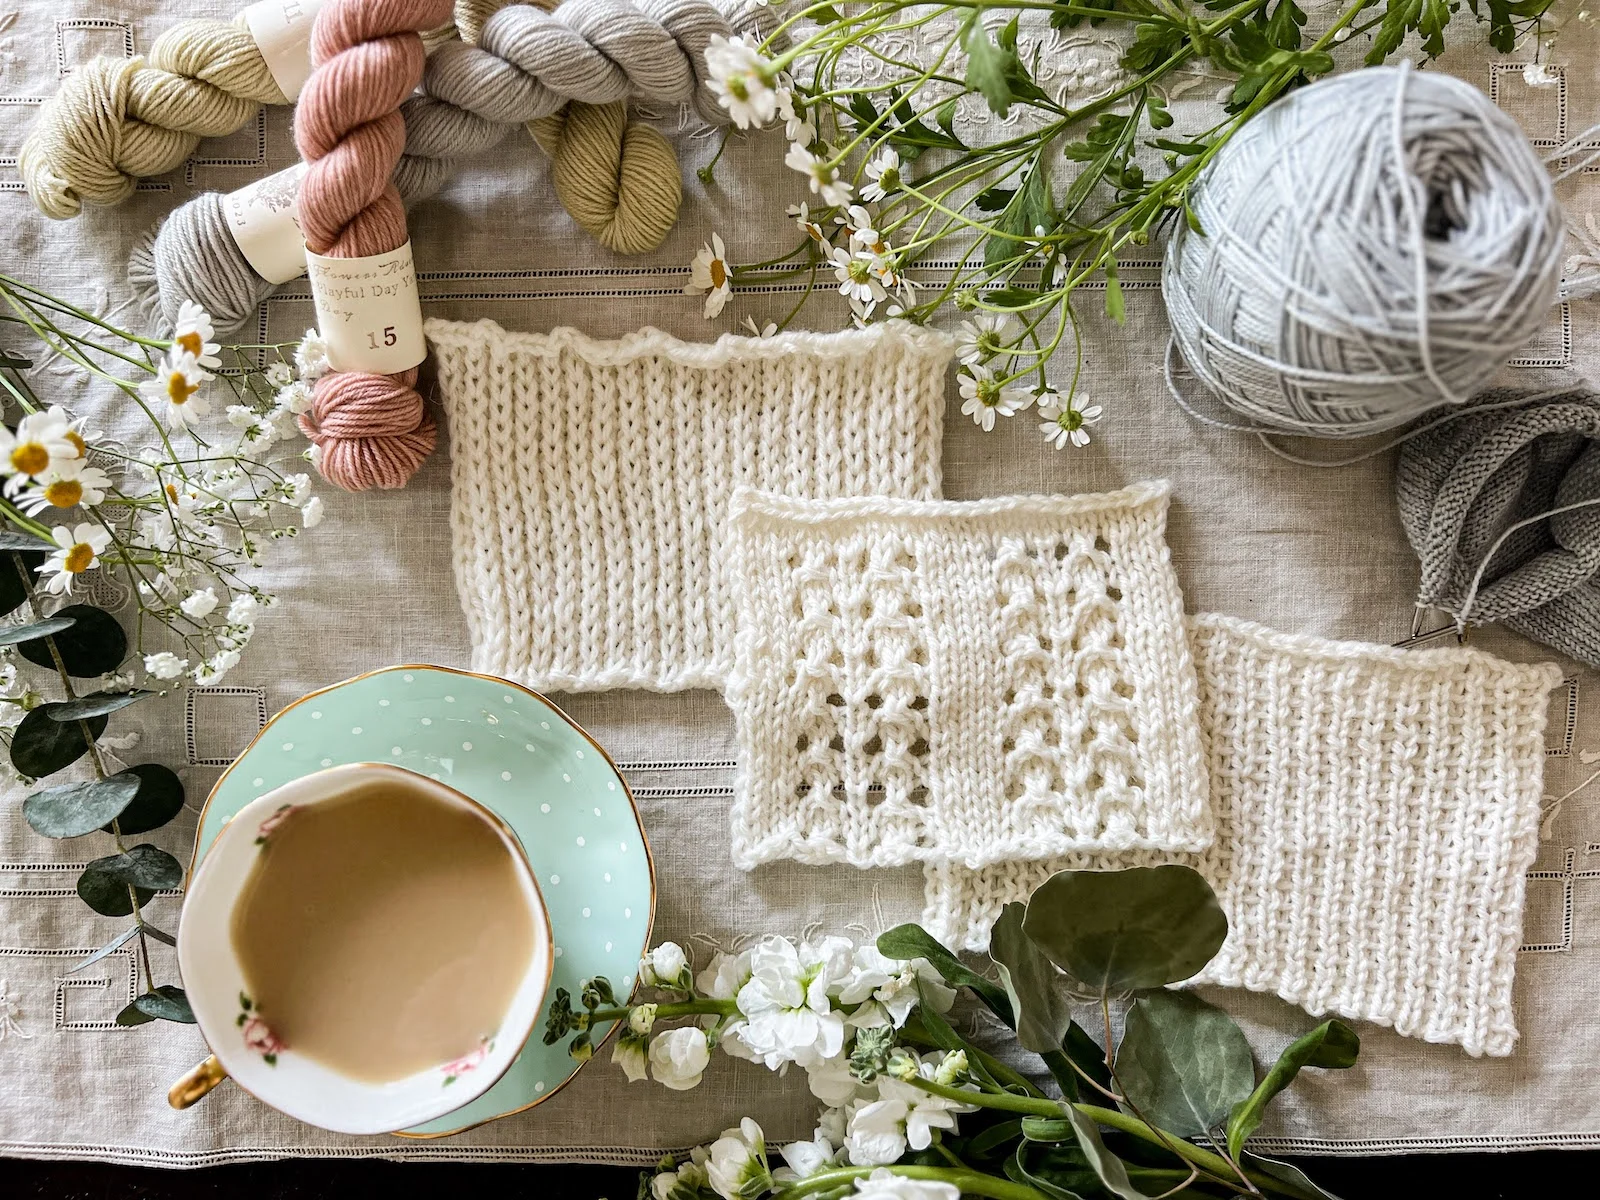
For additional softening, consider adding a strand of lace-weight silk mohair. Suri alpaca would also work. The intense halo of these yarns will add a blurry effect to your scarf, like in the swatch below:
You could also consider using the color wheel to help guide your yarn choices. Depending on how you’d like your scarf to look, you could do complementary colors or you could do adjacent colors. If you are looking for a scarf that is a little more joyfully chaotic, then no need to worry too much about color theory.
Okay, I think that’s it! If you have any questions about how to make this very simple scarf work, drop them down in the comments below.

Let’s stay connected!
Join my newsletter for 30% off all new releases, regular updates with helpful tips and tricks, first crack at registration for upcoming workshops, exclusive discounts, and more.
I’m on YouTube now and would love to have you join me there for regular project updates, technique tips, chats about goings-on in the knitting world, and more.
Prefer to read without ads? Join my Patreon, which starts at just $1 a month!
Join the A Bee In The Bonnet Facebook Group to participate in knitalongs and other fun community events
Come hang out with me on the A Bee In The Bonnet TikTok
Follow along on the A Bee In The Bonnet Instagram
Get inspired via the A Bee In The Bonnet Pinterest