I’ve had a few people asking for details of how I am making my mitered square scrappy blanket, so I thought I would create a free tutorial post for you. If you would like to use up your own scraps to knit a mitered square blanket, whether you want to make baby blankets or a large throw, this is a great way to do so.

Step one: figure out how much yarn you have
The first step if you want to knit a mitered square blanket is to figure out how much yarn you have available for that blanket.
I knew I wanted this blanket to help use up all of my sock yarn scraps. I also knew, though, that I was not up for knitting an entire blanket on US size 2 (2.75 mm) needles. As a result, I knew that I was going to hold my sock yarn double and knit this blanket on US 6 (4 mm) needles.
I started by looking in all my usual places to gather up all my leftover bits of fingering-weight yarn. I keep most of my yarn in a couple spots around the house, but sometimes leftovers end up in other places, too. If you’re like me, make sure to do a thorough sweep.
You’ll also want to make sure that all the yarn you’ve chosen is about the same thickness. This won’t work well if you have fingering-weight yarn that you’re planning to hold single alongside worsted weight yarn. Your squares won’t line up size-wise. For a mitered square blanket like this, you really need consistent gauge across each of your squares.
Step two: knit a mitered square
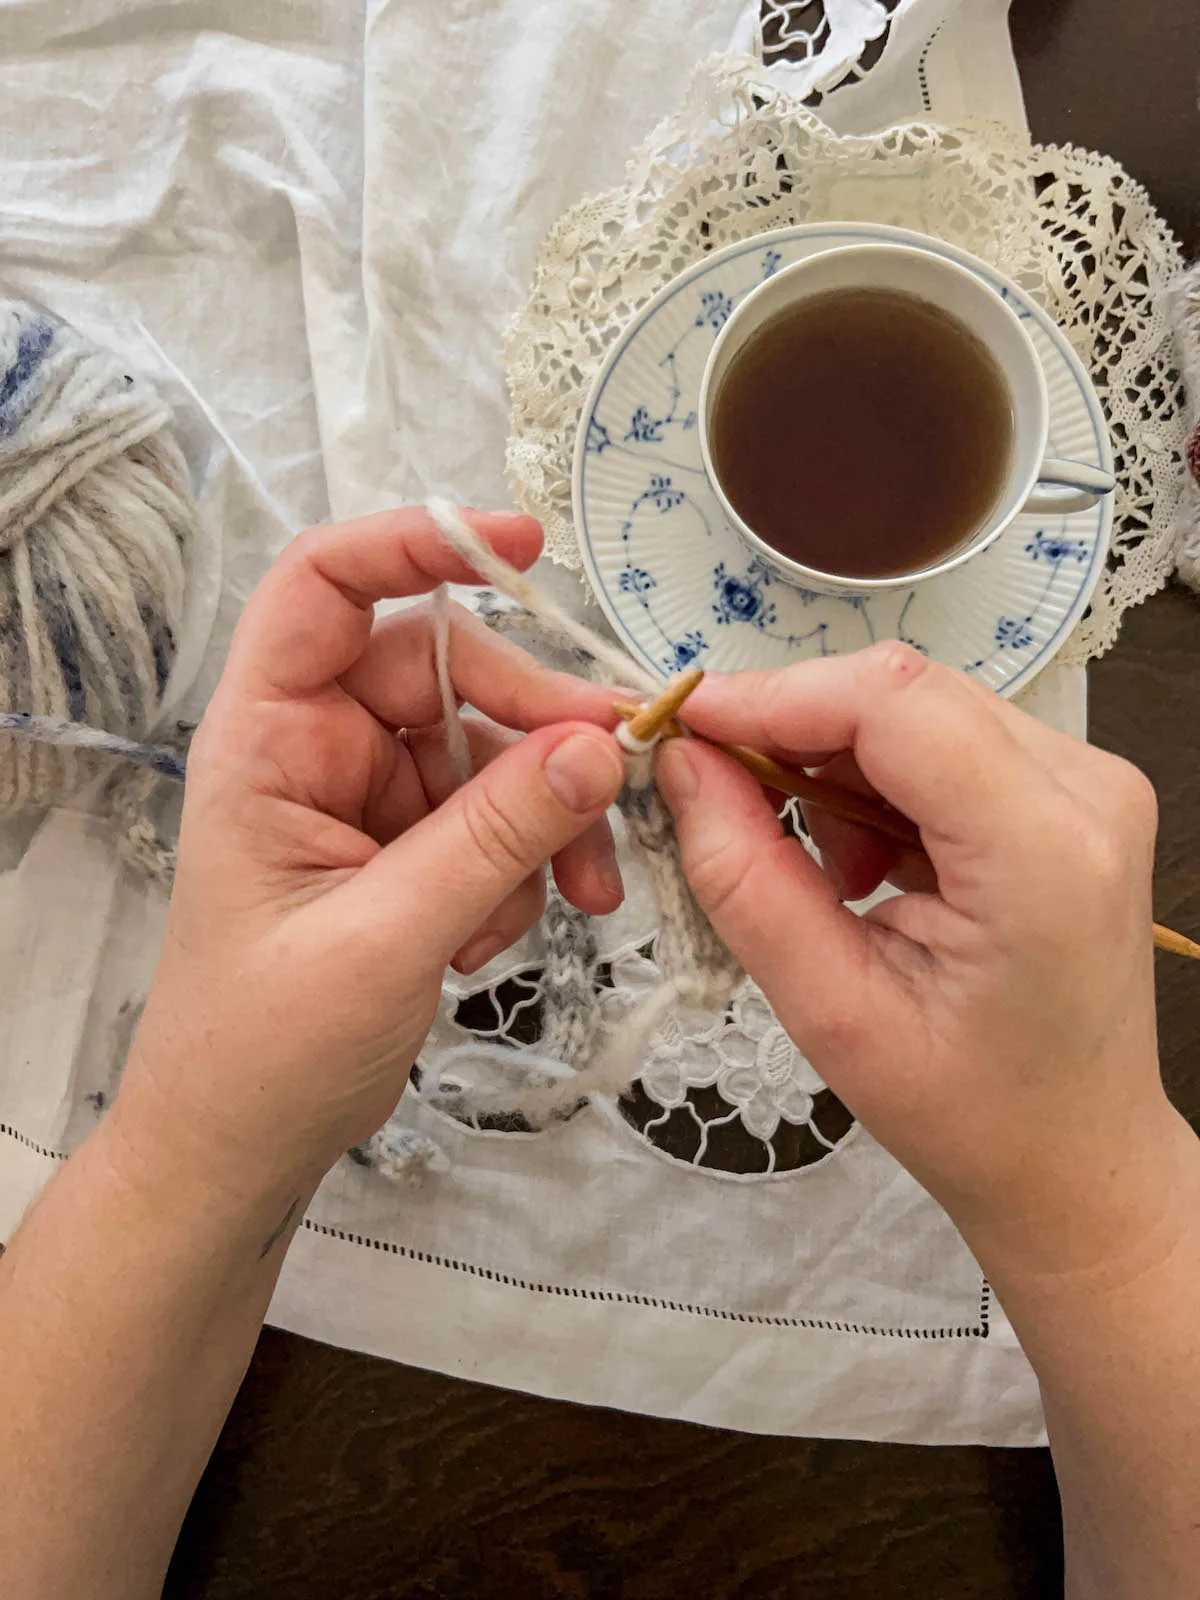
Once you’ve gathered all your yarn and decided which size needles you’re going to use, knit yourself a mitered square. I am knitting my mitered squares using 35 stitches to cast on.
When I make mitered squares, I use the crochet cast-on instead of my usual long tail cast-on. I’ll give you a little video tutorial for that in just a second. I like the crochet cast-on because it creates cast-on edges that will match the slipstitch edges along the other sides. This is a trick I learned from Woolly Wormhead, and I think it’s a great one.
Here’s the video tutorial for the crochet cast-on:
You can make your mitered squares larger or smaller by casting on more or fewer stitches. Just make sure that however many stitches you cast on, it’s an odd number. That’s because you’ll decrease on either side of the center stitch until you take your square down to one remaining stitch.
I knit my mitered squares for this blanket using circular needles, and I strongly suggest you do so, too. That’s because, as the blanket grows, you’ll be attaching each square to previous squares as you work. Having the cable between stitches helps the square curve more comfortably.
For my mitered squares, I follow the following steps:
- Cast on 35 stitches.
- Knit one row.
- Slip one stitch, knit 15 stitches, sk2togpsso, knit 16 more stitches to the end of the row, and turn.
- Slip one stitch, knit to the end of the row, and turn.
- Slip one stitch, knit 14 stitches, sk2togpsso, knit 15 stitches, and turn.
- Slip one stitch, knit to the end of the row, and turn.
- Slip one stitch, knit 13 stitches, sk2togpsso, knit 14 stitches, and turn.
- Slip one stitch, knit to the end of the row, turn. You’ll notice that with each right side row, you are decreasing one stitch on either side of that center stitch.
- Continue working like this until you have only one stitch remaining on your mitered square. Do not break the yarn and bind off that final stitch. You’re going to be joining your mitered squares as you go, so this stitch will also form the first stitch of your next mitered square.
If you’re worried that last stitch will slip out and unravel, clip a progress keeper into the stitch to hold it in place temporarily. I love these cute progress keepers from Twice Sheared Sheep (that’s an affiliate link, which means if you choose to buy something through this link, I’ll receive a small commission at no extra cost to you. Thanks for supporting my work!). I use the bunny one, myself.

A quick note about those center decreases
Different mitered square styles use different decreases in the center. I use sk2togpsso because I like the way it looks. A central double decrease is another common variation. You can also knit to two stitches before the center stitch, ssk, k1, k2tog, and knit to the end.
This is really a stylistic preference, and you should feel free to choose the method that works best for you.
Some knitters also like to use a stitch marker or two to mark the decrease. The placement and movement of the marker will depend on what kind of decrease you use. You should feel free to experiment if you think it’ll be helpful for you.

Step three: measure and weigh that mitered square
After you finish your first mitered square, you need to measure it and weigh it.
This is one of the only times I’m a fan of having a kitchen scale (I’m from the US, so I bake with measuring cups). While I don’t often use my kitchen scale to measure flour and sugar, I use it all the time to measure yarn because it measures in grams.
Weigh your mitered square and compare that to the weight and yardage of your original skein of yarn. If you don’t have the ball band but you remember what the yarn was, you can look it up online pretty easily.
Using a little math, you can very easily figure out how many yards of yarn are needed for each mitered square. For example, here’s how I would do that math for my mitered squares.
Let’s say I’m using a yarn that has 400 yards per 100 grams. That means each gram of yarn has 4 yards (400 ÷ 100). If I’m holding my yarn double and my mitered square weighs 10 grams, I know I need 20 yards or 5 grams of each strand of yarn. (These numbers are entirely made up for the sake of simplicity).

Step four: calculate how much yarn you’ll need to knit a mitered square blanket in its entirety
Once you figure out how much yarn each mitered square uses, you can weigh all the yarn you’ve gathered up and figure out whether you have enough yarn to knit a mitered square blanket in the size you want to make.
For example, if I want to make a blanket that’s 40” wide by 80” long, and each square is 4” per side, I know I’ll need 200 squares (10 wide x 20 long). If each square weighs 10 grams, I know that I’ll need about 2,000 grams of yarn (10 grams per square x 200 squares).
To do your own calculations, follow these formulas.
- Length of blanket ÷ width of square = number of squares for length
- Width of blanket ÷ width of square = number of squares for width
- Number of squares for length x number of squares for width = total number of squares
- Total number of squares x weight of one square = total weight of yarn needed
At the end of all this weighing, measuring, and calculating, you may find that you don’t have quite enough yarn on hand. If that’s the case, you can buy some more and supplement your supply or wait until you have more leftovers.

Step five: knit on to your heart’s content
In this section, I’ll walk you through the different steps for adding squares at different points in your blanket.
If you’d rather watch a step-by-step tutorial, you can do that in this video. Otherwise, read on below.
Continuing the First Row
When you’re ready to keep going, insert your needle back into that remaining stitch from your first mitered square and attach your new yarn.
Using your new yarn, pick up half minus 1.5 of the stitch amount you cast on for your first mitered square. For example, for my mitered square, I would pick up 16 stitches (35 stitches ÷ 2 = 17.5, and 17.5 – 1.5 = 16). That leaves me with 17 stitches on the needles, including that first stitch carried over from the previous square.
Then, using my crochet hook, I will cast on the remaining 18 stitches with the crochet cast-on. You’ll use the crochet cast-on for the second half of each square that you cast on in the first row.
Once you have your stitches cast on, work your mitered square exactly as you did the first.
Knitting the First Square of Each New Row
When you’re ready to start a new row of mitered squares, use the crochet cast-on again to cast on half plus 0.5 of the necessary stitches. For my 35-stitch mitered square, that would mean I would use the crochet cast-on to cast on 18 stitches.
Then, pick up and knit one stitch for each slipped stitch along the top edge of the first mitered square on the row below. By the time you’re done, you should have picked up 17 more stitches, for a total of 35 stitches on the needle. Then, continue to work your mitered squares as you have been.
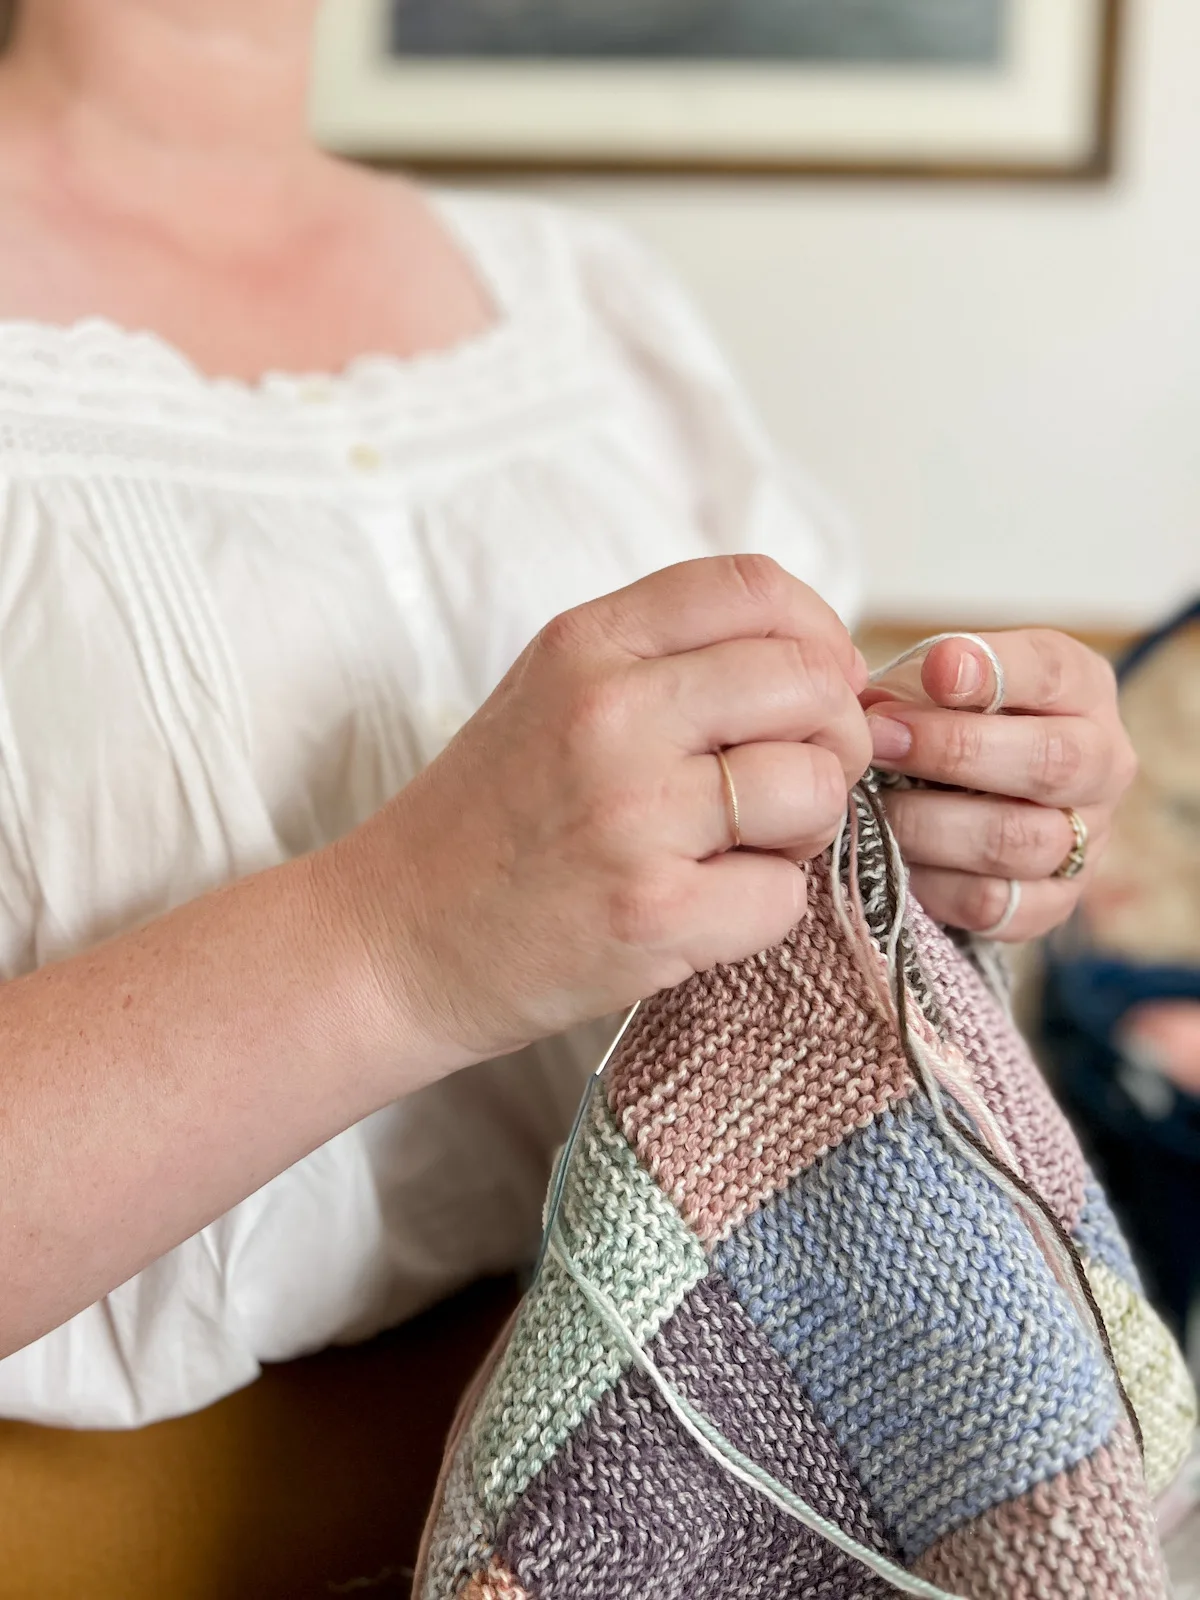
Adding Squares After the First Square in Each Row
Going forward, every time you attach a new square except for the first square of each row, you will just pick up stitches along the edge of the previous square in the same row and then along the square immediately below. You won’t need the crochet cast-on at all. Here’s a picture of what that looks like.

Be prepared for this process to take a while before you have a finished blanket, especially if you are knitting at a relatively fine gauge. I started my blanket back in December 2022. As of today, I’m about ⅓ of the way finished with it. Of course, there have been lots of other projects in the interim (especially sock designs!), but it’s still a significant undertaking.
Many knitters like to add a garter stitch border to their mitered square blankets once the main part of the blanket is finished. I haven’t decided yet whether I plan to do that on mine. A simple border can often help it look more polished, but I’m not sure whether it would detract from the joyful chaos of the squares. What do you think would look better?
Miscellaneous Tips and Tricks
As I’ve been working on this blanket, I’ve discovered quite a few little bits here and there that have been useful tidbits of information for later. I’ll drop those notes here for you.
Wrangling The Loose Tail from Each Square
As you might suspect, this project generates a lot of ends that need to be woven in. I try to stop at the end of each row to weave in my ends, but sometimes I let them pile up. If you keep a darning needle handy and spend a little time periodically, they won’t be too hard to manage.
Recommended Needle Size
Choosing the right needle for your mitered square pattern is part art, part science. Because you’re working with scraps, not all of your yarns will be identical. The needles that work best for some may not be great for others.
I suggest testing out a couple different sizes to see which fabric density you prefer. Start with the recommended needle size on the ball band for a few of the yarns (if holding the yarn single), or the average recommended needle size for the combined weight of yarns if you’re holding more than one strand together at the same time. For example, in my blanket, I’m holding two strands of fingering-weight yarn together as I work. That makes approximately a DK-weight yarn, so I went with a US size 6 (4 mm) needle.
I hope this blog post has been helpful for you, but if you have any questions, I’m happy to help out where I can. Feel free to drop them in the comments.
And if you use this free tutorial to help you knit a mitered square blanket yourself, I hope you’ll tag me in any photos or videos you post on social media! I’m on Instagram, Threads, and TikTok as abeeinthebonnet.
Let’s stay connected!
Join my newsletter for 30% off all new releases, regular updates with helpful tips and tricks, first crack at registration for upcoming workshops, exclusive discounts, and more.
Join the A Bee In The Bonnet Facebook Group to participate in knitalongs and other fun community events
Come hang out with me on the A Bee In The Bonnet TikTok
Follow along on the A Bee In The Bonnet Instagram
Get inspired via the A Bee In The Bonnet Pinterest