I’ve been knitting for 15 years now, so I don’t often use a lifeline nowadays. When I first started, though, they saved my bacon on more than one occasion. While using one is fairly straightforward, there are some helpful tips and tricks to make it an even better experience.

In today’s post, I’m going to dig into what exactly a lifeline is, why you would want to use it on some of your knitting projects, and how to do so in the most efficient and effective way possible.
What is a lifeline in knitting?
A lifeline is a strand of yarn or thread that has been pulled through the stitches of your project at a set point. It essentially acts like an additional needle or like the cord between two circular needle tips.
It’ll hold the stitches so that, if you need to unravel at some point, you can take your work back to where the life line is threaded, and then your work won’t unravel any further. Once you reach that point, you can easily put your stitches back on your needles and start again.
Why you want to use a lifeline when you’re knitting
Lifelines are helpful in any situation where you suspect that you may need to go back and fix mistakes or you might drop stitches without noticing them.
Beginner knitters are more likely to find lifelines useful because they haven’t yet learned to read their stitches well. Advanced knitters, though, still use lifelines when working on very complicated projects or projects with yarn that makes lifelines particularly useful. Let’s explore more.
Using a lifeline with lace knitting
Lace work is the classic scenario for lifelines. The more complex the lace pattern and the less experience you have working lace, the more likely it is that you want to use a lifeline.
If you have very little experience knitting lace, I would encourage you to use a lifeline no matter how simple the pattern is. As you get more comfortable reading your stitches and making and fixing mistakes, you can start making judgment calls about whether you need a lifeline or not.
For intermediate knitters, I’d recommend a lifeline for stitch patterns more complex than 12 stitches or 12 rows in a repeat. If the pattern includes more complicated stitches, or if it is one of the lace varieties where you have yarn overs and decreases on every row instead of every other row, I’d use a lifeline even for patterns with smaller repeats.

Using a lifeline with brioche knitting
Knitters also report that lifelines are useful when working brioche. I don’t do brioche very often, but fixing mistakes in brioche can be a real pain in the rear.
That’s because a brioche stitch involves more than one strand of yarn doing different things at the same time. You’ll have your stitch, but there is also a strand of yarn floating over the top of the stitch, too.
Unknitting those stitches and putting them back on the needles can create a real mess, especially once you’re working in two-color brioche. Having a lifeline in place will save you significant amounts of frustration.
Using a lifeline with hard-to-read yarn
If you are working on a project with yarn where it’s hard to see your stitches, a lifeline can be useful there, too.
This is especially true for yarn in dark colors, yarn with a strong halo from mohair or suri alpaca, unspun yarns, yarns with a significantly fluctuating thick-thin-thick-thin structure, very lofty woolen-spun yarns, and certain highly textured novelty yarns.
When you’re working with these sorts of yarns, it can be harder to see each individual stitch. That means, when it’s time to rip back, it’s also harder to make sure each stitch ends up back on your needles. Using a lifeline can help make sure you don’t miss any of them.
When to insert a lifeline
There are a few different schools of thought about when to insert a lifeline into your work. Let’s explore them.
One idea is that you should insert the lifeline after you’ve worked the final row of a repeat and before starting the first row of the next repeat. This is usually a reasonable approach, but as with anything in knitting, you shouldn’t follow it blindly.
Sometimes, the last row of a repeat can be pretty complicated. A complicated row isn’t always where you want to put your lifeline.
Others say that you should add a lifeline every 2 to 4 inches. As with the previous rule, this is generally pretty good, but not always.
The same is true if your measurement interval ends up putting you on a complicated row when it’s time to insert your lifeline. If that’s the case, that’s not really the best spot to insert the lifeline.
So when I’m working with lifelines, I ask myself a few questions.
- Where is an easy spot with mostly knit stitches where I can insert my lifeline? Rest rows are good for this.
- Is that spot somewhere in the repeat where I will be able to easily identify it and resume working from that point?
- How often do I think I might need to rip back this work?
Examples of where to place a lifeline
If I’m working a pattern with all knit stitches on every even row, and it’s a four-row repeat, I might insert a lifeline on the fourth row after every fourth repeat.
If I’m working a pattern that only has all knit stitches on the sixth and 12th rows, and it’s an 18-stitch repeat as well, I might insert a lifeline every sixth and every 12th row until I get the hang of the pattern. Then I might switch to just inserting the lifeline every 12th row or every sixth row.
In that scenario, it wouldn’t matter whether I chose the 12th or the sixth row, so long as I remembered which row it was that I chose.
What to use for a lifeline
When choosing a yarn to use for your lifeline, keep in mind two key factors: it needs to be visible against your work, and it needs to be a smooth yarn so that it doesn’t snag your stitches.
Usually, I choose a worsted-spun scrap yarn. I make sure it’s in a lighter weight than the yarn I’m using for my project. I also choose a piece of yarn in a contrasting color. If you’re having trouble making sure the color has good contrast, you could always refer to your trusty color wheel.
The reason you want your lifeline yarn to be smooth and finer than your working yarn is so it doesn’t snag on your stitches when you remove it. If the lifeline snags, it can slightly twist the stitches on the needle. That will create a visibly twisted row in your work.
I have also heard of some knitters using dental floss for their lifelines. This makes sense to me for a lot of reasons.
- It’s very smooth.
- It’s pretty fine. Unless you are working in the most delicate lace weight, you won’t have yarn thinner than dental floss.
- It’s usually pretty visible. Dental floss is usually either white or a bright color, so it’s less likely to get lost in your yarn.
- It comes in a handy little case that is easy to toss into your notions bag.
If you do go this route, though, it’s a good idea to make sure that the dental floss you use is unflavored. That is, I guess, unless you actually want your project to smell like mint or cinnamon for a while. That would probably just make me hungry every time I picked up my work.
Finally, a strand of crochet thread, embroidery floss, or other smooth cotton yarn are all popular choices, too.

How to insert your lifeline
Once you’ve chosen your yarn for your lifeline and determined where to place it, your next step is to actually insert the lifeline.
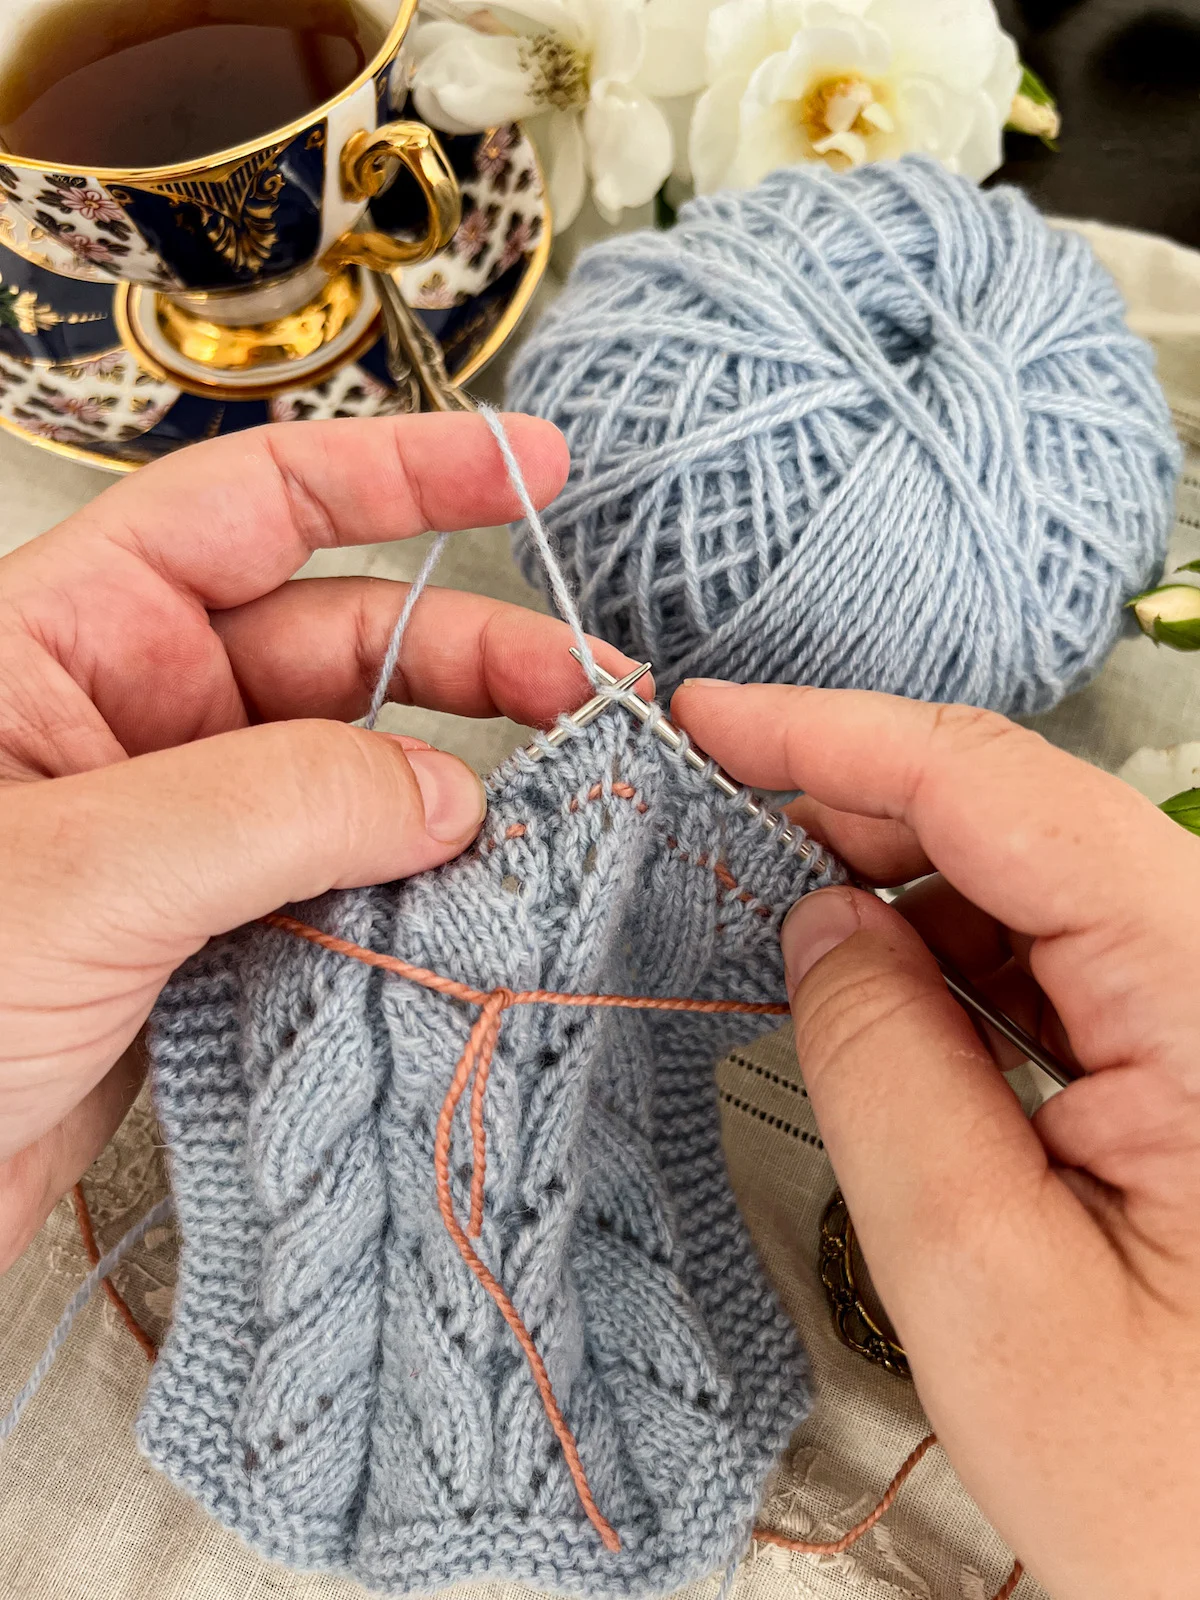
To do so, first, you’ll need to thread your piece of waste yarn (or dental floss!) onto a tapestry needle. Then, use the darning needle to feed the lifeline along the bottom of the live stitches on your left knitting needle. It doesn’t really matter which direction you feed the lifeline, but I like to go from right to left.
This is known as a proactive lifeline, because you’re putting it in before you knit additional stitches. While it’s not the only way to insert a lifeline, it’s far and away the easiest method.
You can also insert a reactive lifeline, also known as an afterthought lifeline, where you insert the knitting lifeline through the right leg of each stitch in a previous row of stitches. This is a more challenging technique, and I don’t recommend it for new knitters if you can avoid it, because you’ll need to read each row of knitting.
When you’re done feeding the lifeline through the stitches on your needle, snip the lifeline and tie off the loose ends. That way, it won’t get tangled in your work.
Here’s a video tutorial showing you how to feed the lifeline through the stitches.
@abeeinthebonnet This week, I’ve got a lot of big thoughts and feelings about lifelines. Here’s how to put one in your knitting so that if you make a mistake, you don’t have to rip everything out and start over from the very beginning. ##knittingtutorial##knittingtiktok##knittok##knitting##knittersoftiktok##knittingislife ♬ Harp's calm and sad music(87118) – paZap
FAQs about lifelines
Lifelines can sometimes create confusion, so here are answers to some frequently asked questions. As more questions pop up, I’ll update this section.
Stitch markers
If you’re working complex lace, you might be using stitch markers between pattern repeats to help keep yourself on track.
When you place your lifeline, it’s important to make sure you don’t also thread it through the stitch markers. You can press the stitch markers up against the underside of your left-hand needle to reduce the likelihood of that happening.
How frequently to move the lifeline
Some knitters place a new lifeline at regular intervals without removing previous lifelines. Then they remove all the lifelines at the end of the project. Others use the same strand of yarn and just move it as the project grows. The choice is yours.
You should either place a new lifeline or move your existing lifeline once you’ve worked your pre-determined number of rows or repeats. Whether you’ve used inches or cm of work, a particular line in your pattern, or a set number of repeats, stick to that same interval each time.

How to keep the lifeline from falling out
Lifelines are pretty secure due to the friction of all the stitches against the lifeline itself. However, if you’ve worried about your lifeline falling out, you can tie the two ends together in front or in back of your work. That’ll keep it secure until you decide to remove it.
About the yarn in this blog post
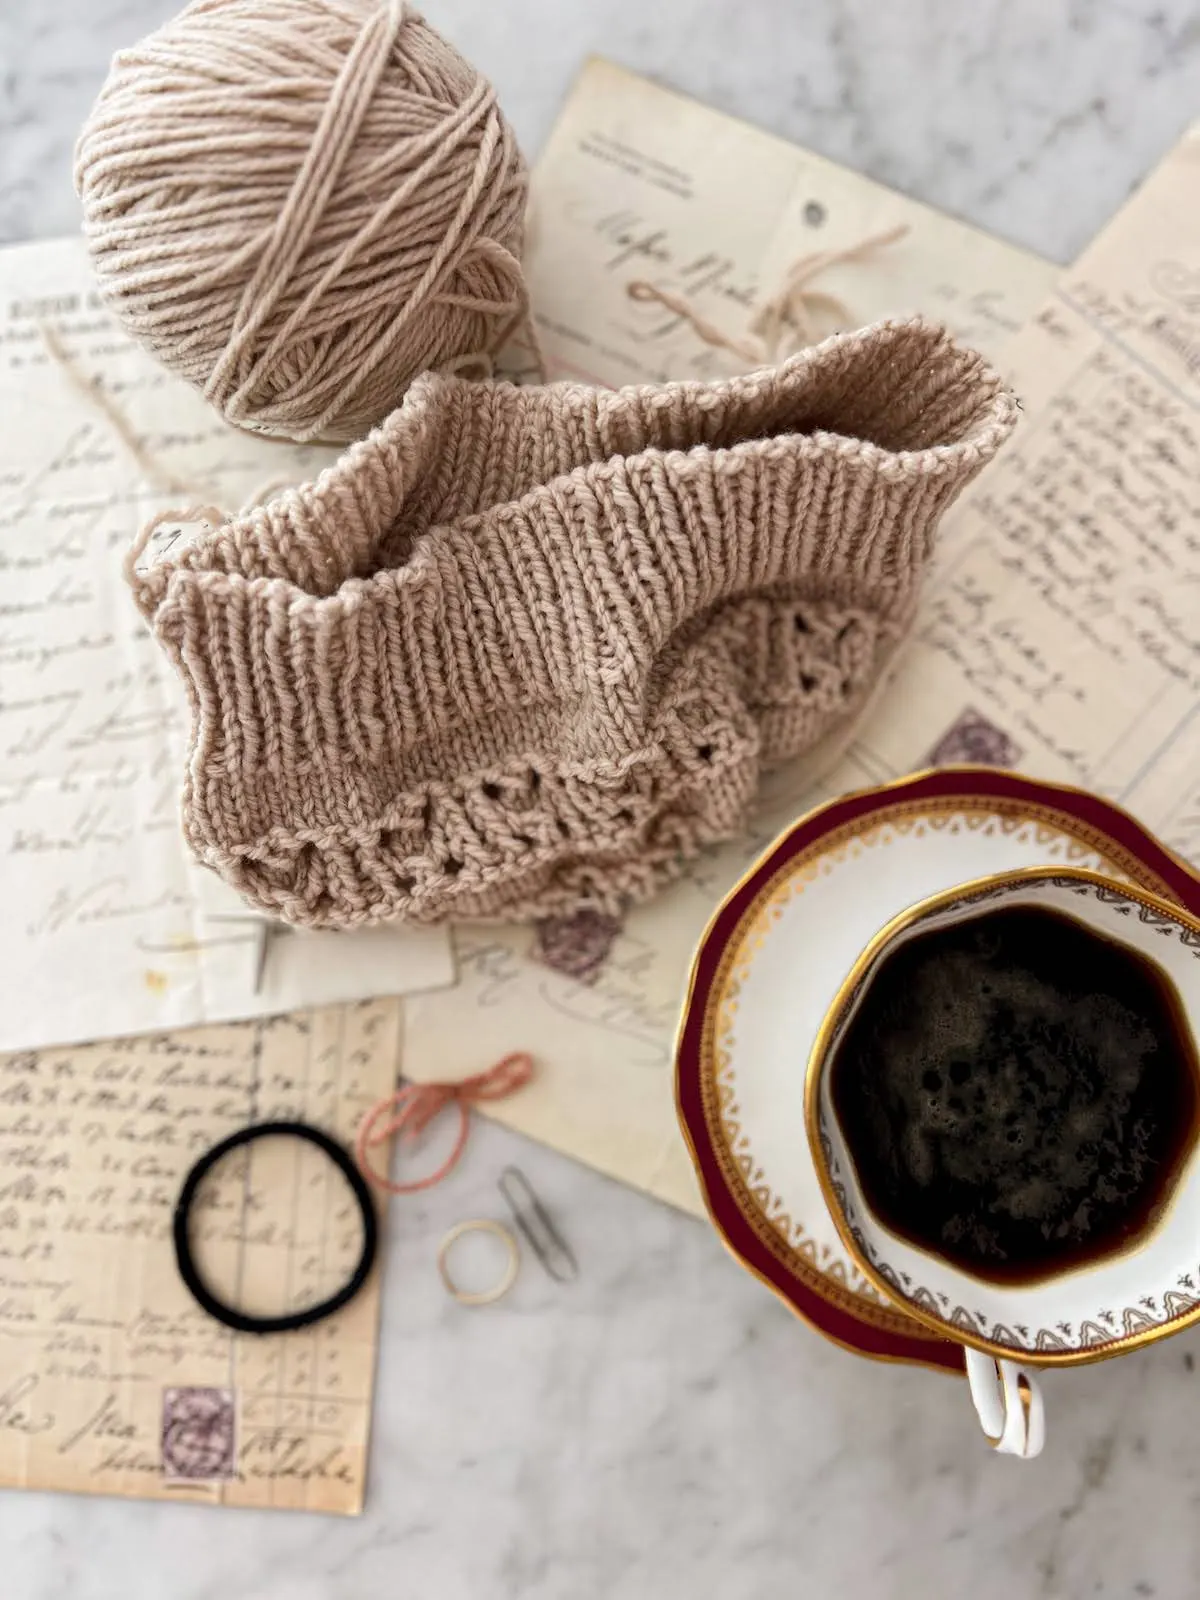
The blue swatch in all of the pictures in this blog post is a gorgeous yarn made of 50% recycled cashmere and 50% virgin cashmere. It was kindly sent to me by the team at Universal Yarns. This yarn has a deliciously soft, fluffy texture with a little bit of grip to it. I love how very lightweight it is.
If you’d like to try Cashmere Lusso for yourself, you can find all the colors here (that’s an affiliate link, which means if you choose to buy something through this link, I’ll receive a small commission at no extra cost to you. I will always identify affiliate links for you.. Thanks for supporting my work!).
Let’s stay connected!
Join my newsletter for 30% off all new releases, regular updates with helpful tips and tricks, first crack at registration for upcoming workshops, exclusive discounts, and more.
Join the A Bee In The Bonnet Facebook Group to participate in knitalongs and other fun community events
Come hang out with me on the A Bee In The Bonnet TikTok
Follow along on the A Bee In The Bonnet Instagram
Get inspired via the A Bee In The Bonnet Pinterest


How can I get the pattern for the scarf you’re demonstrating on in the lifeline video. It looks gorgeous.
Hi there! Unfortunately, that’s just a swatch and there isn’t a scarf pattern. However, I did use that stitch patter in the hat, mitts, and cowl in my Good Things Collection, and I can add a scarf with this stitch pattern to my list of design plans.