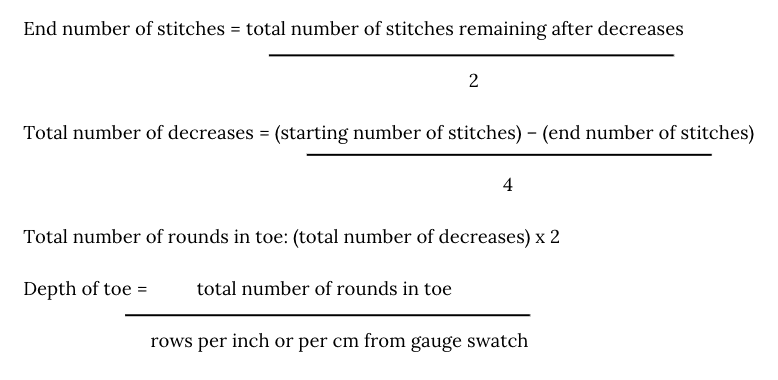
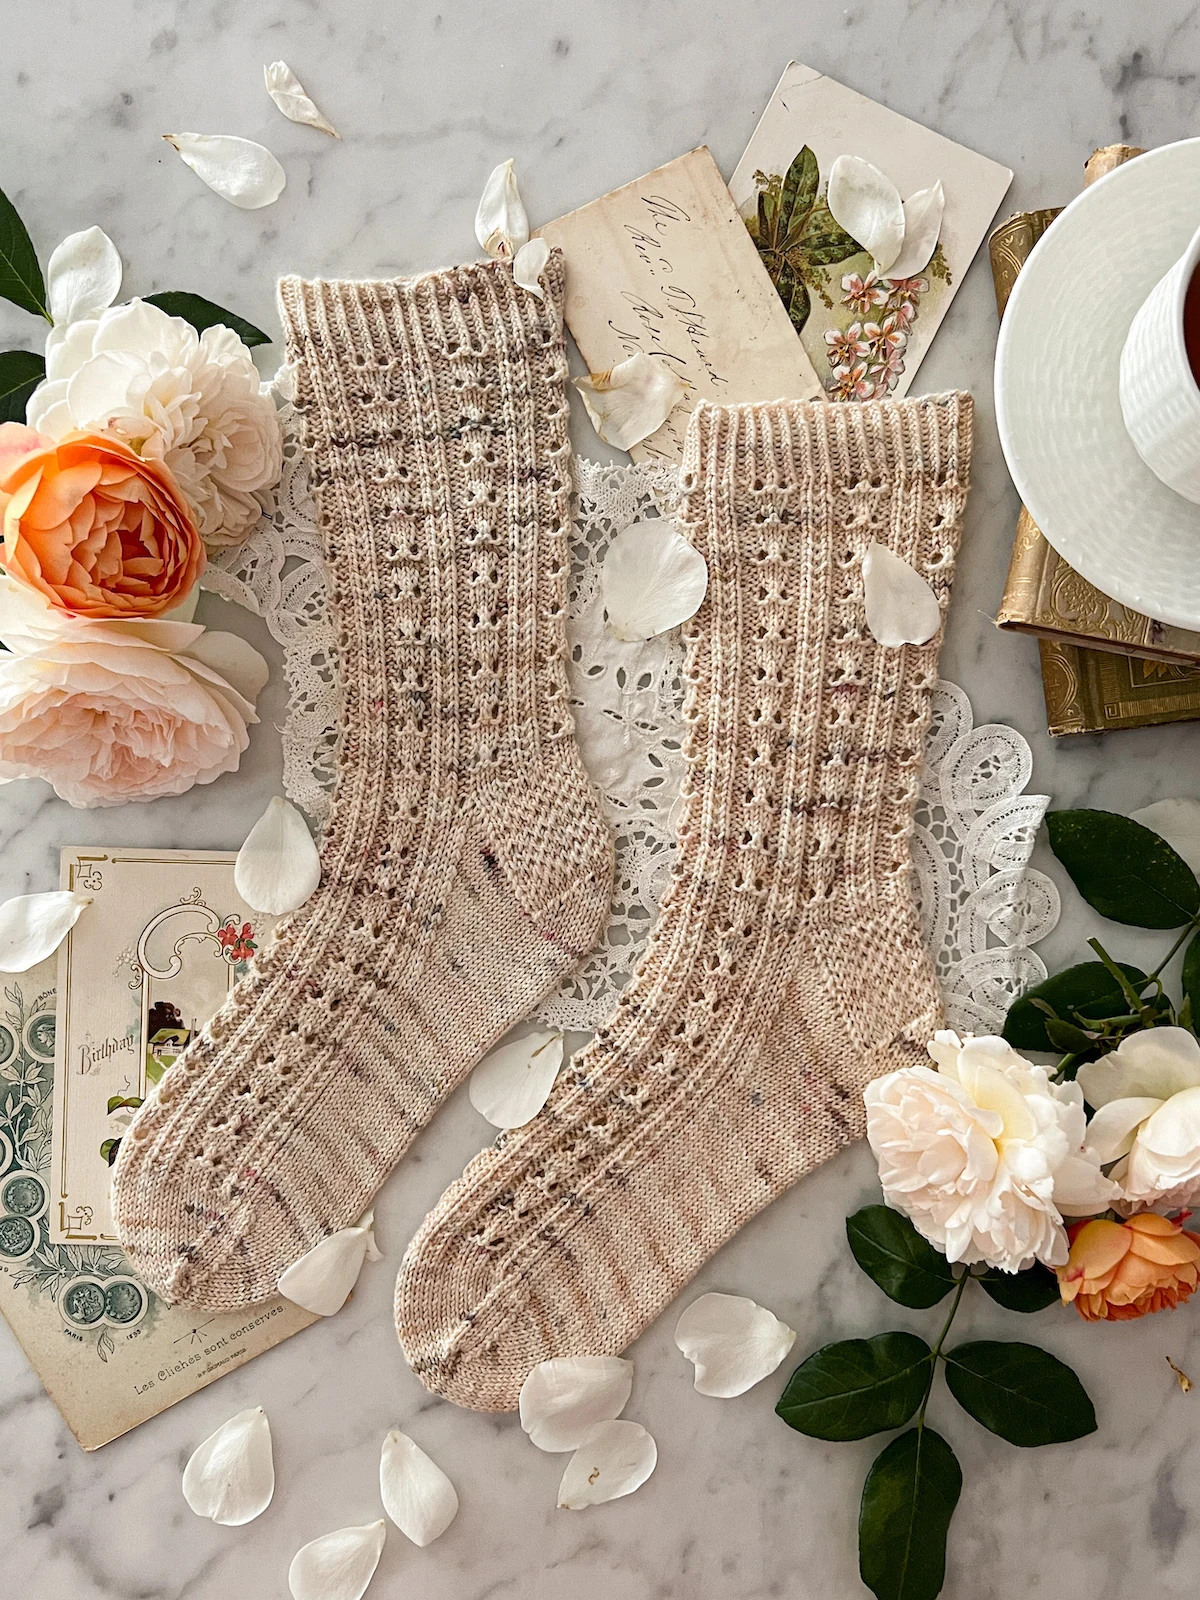
Curious to try building a custom sock pattern for yourself? This vanilla sock recipe will help you figure out how to make a basic sock that’s just right for you.

This isn’t a full pattern with exact numbers for you. Instead, this vanilla sock recipe is designed to help you create your own pattern for a vanilla sock based on your own gauge, your desired yarn, and your own unique foot measurements.
I’ve got a strong preference for cuff-down socks, so that’s how my vanilla sock recipe works, too. If you prefer toe-up socks, some parts of this recipe are adaptable, but you’ll want to look for different instructions for the toe and heel.
Step one: find your gauge
To create your vanilla sock recipe, you first need to know how many stitches per inch you’ll get with your chosen yarn and needles. If you need help choosing a yarn, I’ve written a whole bunch on that topic.
Since you’ll be knitting your basic sock in the round, do a gauge swatch in stockinette stitch in the round. You can do this a couple different ways. First, you can just knit a gauge swatch and cut it in half when you’re done. If that’s not appealing, you can knit a speed swatch, which does give you the option of unraveling and reusing the yarn if you need it.
At the end, you need to give your gauge swatch a gentle soak and lay it flat to dry. A lot of knitters skip this step, but at some point, you are going to wash your socks. You need to know if getting them wet will significantly change the yarn you’re using. Please do not skip this step.

Once the swatch has dried, measure your swatch to see how many stitches and rows you have per inch. Make note of those numbers somewhere. For in-depth discussion about how to swatch effectively and make sure your knits fit, check out this great book by Tian Connaughton. It’s geared toward garment knitters, but the same swatching principles apply.
Step two: calculate the sock circumference for your vanilla sock recipe
This is actually a two-part step. First, you need to figure out the circumference of your foot. To do that, take a measuring tape and measure around the ball of your foot, which is the widest part just beneath your toes. You know the part of your foot you stand on when you’re reaching for something just out of reach? Yep. Measure that part.
Part two involves figuring out the circumference of the sock itself. See, you don’t want to knit a sock that’s the same exact circumference as your foot. That’ll result in a sock that is too lose and will slip and slide on your foot. Instead, you want about half an inch to an inch of negative ease (or 1.25-2.5 cm). That means you should subtract that amount from your total foot circumference to reach the actual circumference of your sock.
For example, let’s say my foot is 8.5 inches around at the ball of the foot. I’d like 1 inch of negative ease, because I like my socks kind of snug. That means I need a sock that’s going to be 7.5 inches in circumference.
Step three: figure out how many stitches to cast on
Now comes the fun part! Using the stitches per inch (or per cm) that you calculated when you did your gauge swatch and the desired circumference for your sock, you’re going to calculate how many total stitches you need.
Your formula for this is simple: (stitches per inch or cm) x (total inches or cm circumference) = number of stitches to cast on.
Here’s an example. If I have 8 stitches per inch and I want my basic sock to be 7.5 inches, I know that I need to cast on 60 stitches. That’s because 8 x 7.5 = 60.
Cast on your number of stitches, work the cuff in whatever ribbing you’d like, and work the leg in plain stockinette stitch until you’re ready to start your heel.

Step four: create your heel
There are lots of different options for heels, but I’m going to share how I calculate the heel flap and gusset. That’s because I think it’s the heel that gives the best fit for the most people.
Make the heel flap
You’re going to work your heel flap across half the stitches of your sock. For example, if you have 60 total stitches, your heel flap will be 30 stitches wide.
Once you know your heel flap width, work back and forth across that heel flap until you’ve worked the same number of rows as you have stitches. For example, if you have a heel flap that is 30 stitches wide, you’ll also work 30 rows. I slip each stitch at the beginning of the heel flap row, which is important for starting the gusset.
Turn the heel
After this, you’re going to turn the heel.
1. Knit half the stitches in the heel flap, then knit two more. Ssk, k1, turn.
2. Slip 1, p5, p2tog, p1, turn.
3. Slip 1, knit to within first stitch from gap, ssk, k1, turn.
4. Slip 1, purl to within first stitch from gap, p2tog, p1, turn.
5. Repeat steps 3 and 4 until you have used up all the stitches in your heel flap, ending after working a WS row.
Work the gusset
Knit across half the heel flap stitches and place a marker. Knit remaining heel stitches, and pick up and knit one stitch in each of the slipped edge stitches along the heel flap. Pick up and knit one additional stitch where heel flap and instep join. (A note: you may find it helpful to place a stitch marker here).
Work in pattern across the instep stitches. (You may find it helpful to place another stitch marker here). Pick up and knit one stitch where instep and heel flap join, and then pick up and knit one stitch in each slipped stitch along the edge of the other side of the heel flap. Work remaining stitches from heel.

Work one round, knitting the sole stitches and working the instep stitches in pattern. Then work the following two rounds:
Round 1: Knit to three stitches before instep, k2tog, k1, work instep stitches in pattern, k1, ssk, knit to end of round.
Round 2: Work one round, knitting the sole stitches and working the instep stitches in pattern.
Repeat Rounds 1 and 2 until you return to the original number of stitches you had after casting on at the beginning of the sock.
Continue knitting until you are ready to work the toe, but before you do, calculate your toe depth. Instructions for that are in the next section.
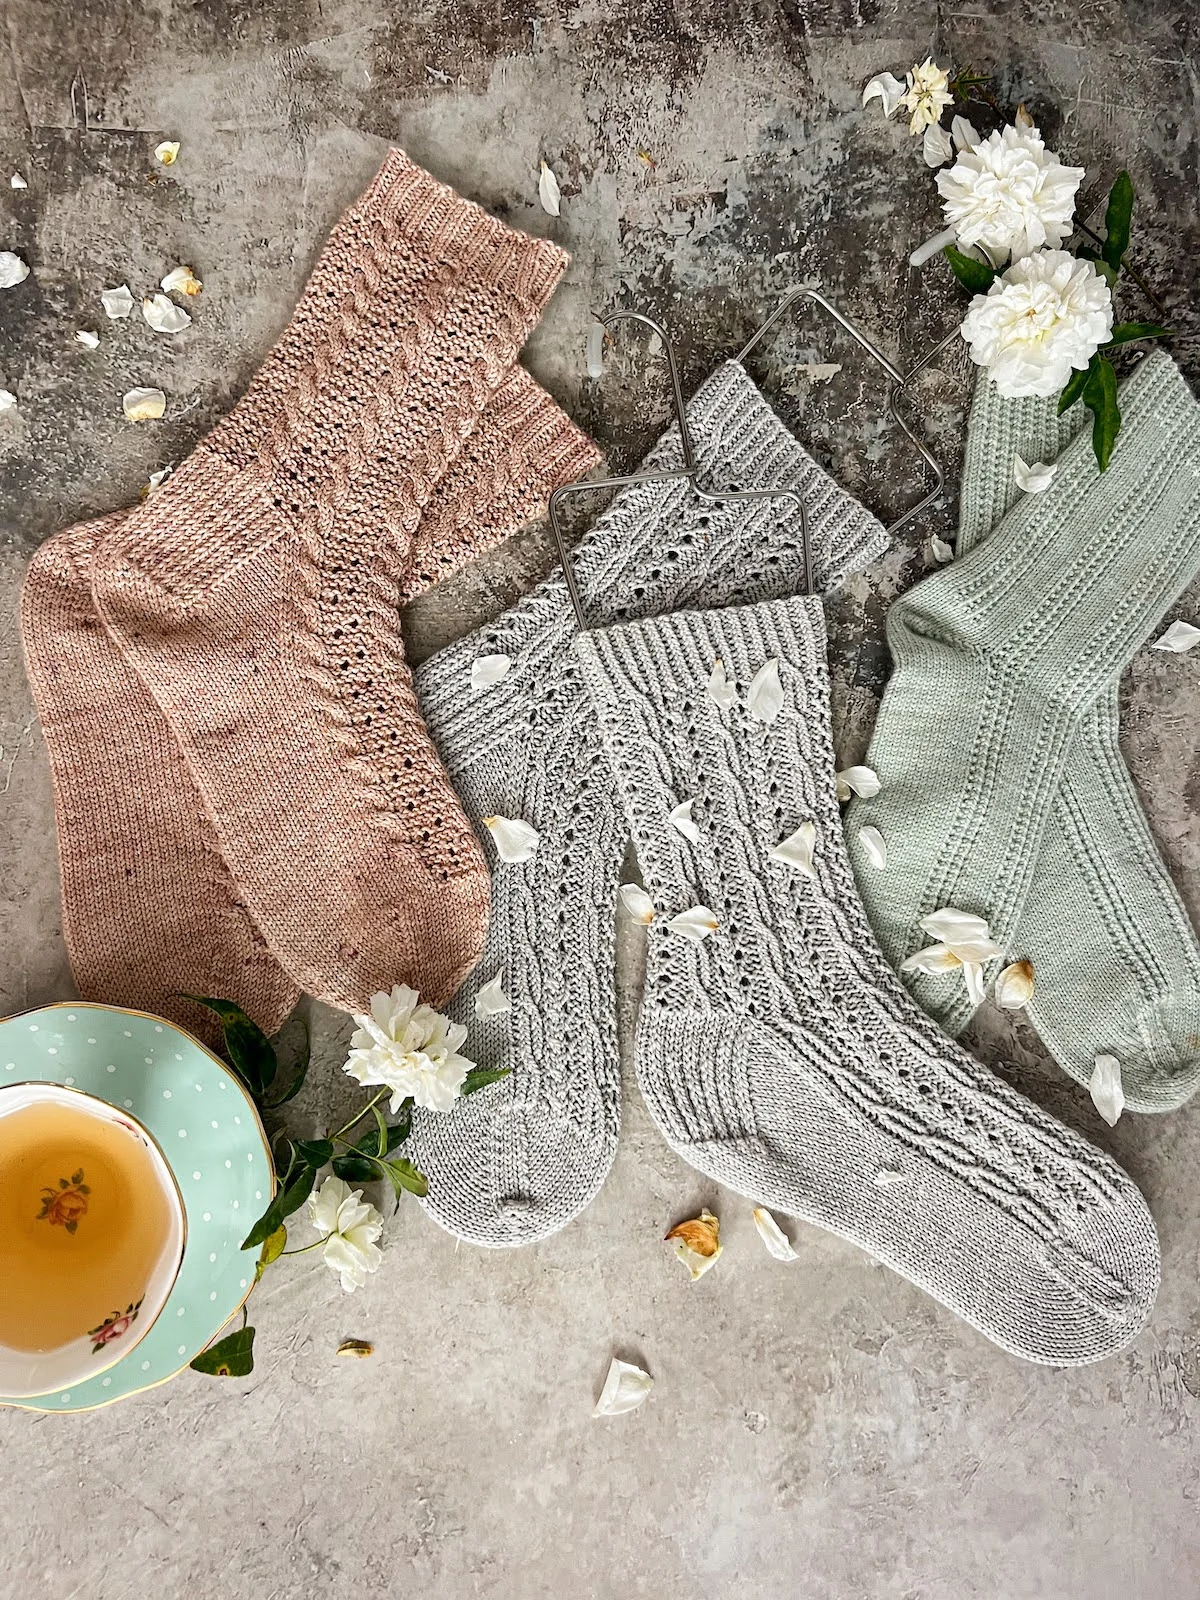
Step five: close your toe
As with the heels, there are different ways to close down your sock toe, but I’m going to give you instructions for the wedge toe. That’s the one I use the most.
But first, you need to know how deep your toe is going to be. That requires knowing a couple numbers. First, you need to know how narrow you want the toe of your sock to be at its smallest point. Then, you need to know how many stitches that will require. Finally, you need to know how many rounds you’ll need to work to get to that point.
For example, I like my toe to be 1.5” wide at its narrowest point. If I have 8 stitches per inch, that means I need to get down to 12 stitches on the top and bottom of the sock, or 24 stitches total. I need to get there from my original number of 60 stitches. The wedge toe decreases the total number of stitches by 4 stitches every other round, so I know I need to work 18 rounds in my toe.

I also know from my gauge swatch that my socks tend to have a row gauge of 10.25 rows per inch. That means my toe with 18 rounds will be 1.75 inches deep.
Here’s the math for all that.
Now that you’ve done this final bit of math, you know how deep your sock toe will be and therefore when to start working your sock toe. When it’s time to start working your sock toe, follow this process:
1. Knit one round.
2. Instep stitches (first half of stitches of the round): k1, ssk, k to three stitches before end of instep, k2tog, k1. Repeat for sole stitches (second half of stitches of the round).
3. Knit all stitches in the round.
4. Repeat steps 2 and 3 until you have your desired number of stitches for your final toe width. Note that for each repeat, you will have two fewer stitches between your ssk and your k2tog than you did on the previous repeat.
5. Move your stitches onto two needles, an even amount per needle, with the sole stitches on one needle and the instep stitches on the other.
6. Graft your toe together using stockinette grafting. If you need help with this final step, here’s a great tutorial.
And voila! You have your very own vanilla sock recipe that’s tailored to your own unique feet. A good, basic sock recipe will help you crank out socks with ease. I hope you enjoy your new socks and stay cozy for years to come.
One last note: if you’re struggling with finishing a full pair of socks, you’re not alone. My friend Teresa has a great post to help you conquer second sock syndrome.
Let’s stay connected!
Join my newsletter for 30% off all new releases, regular updates with helpful tips and tricks, first crack at registration for upcoming workshops, exclusive discounts, and more.
Join the A Bee In The Bonnet Facebook Group to participate in knitalongs and other fun community events
Come hang out with me on the A Bee In The Bonnet TikTok
Follow along on the A Bee In The Bonnet Instagram
Get inspired via the A Bee In The Bonnet Pinterest


This is a great tutorial/recipe for socks. Vanilla socks will be my next project. I knitted a pair of socks years ago and hated it. Made no sense. I’m glad I signed up for your site. Thank you.
I’m glad to hear this was helpful for you. Best of luck with your next pair.
Hi! I’ve been following your pattern for my first pair of socks, and I’ve been having a blast! I have a question about knitting the heel flap: is that still in stockinette stitch? And are the slip stitches purlwise?
Thanks you!
The heel is in a pattern with columns of slipped stitches stacked on top of each other. It’ll look like ribbing, but it’s not. Slipped stitches are definitely slipped purlwise but with yarn held in back!