In our second-to-last installment in the better knitting photography series, we’re talking about how framing your photograph affects the story your photo tells.
Oftentimes, a picture that’s poorly framed can feel confusing, off-kilter, or muddled. When your focus or framing is off, that can make it hard to tell what the point of the picture is. I’ve even had a slight feeling of seasickness looking at some badly framed photos.
When you’re photographing knitwear, framing is especially important, because your knits tell a story. The photograph should help communicate that. Framing your photograph is part of how you make sure your story is clear.
So here are some helpful tips so that you can frame your pictures more effectively.
But first, a quick note: this post is one in a series of posts about ways to improve your knitting photography. Here are quick links to the other posts in the series.
Now, let’s get to it.
Understand the Rule of Thirds so Framing Your Photograph is Easy
The rule of thirds is a classic. I don’t always follow it, but I made sure I understood it before I decided when to break it.
It works something like this. The human eye is drawn to odd numbers. To make your photograph more appealing, break it up into thirds. In the most common formulation of this rule, your subject will fill 1/3 of the photo. That leaves the other thirds open.
If you’re shooting on your phone, your phone camera will have a setting where you can turn on grid lines to help you with the composition of your photo. Take advantage of that! It’s like riding a bike with training wheels or bowling with bumpers. You can learn, and then turn it off when you’re ready.
I really like to have photos set up in one of two ways when I’m taking advantage of the rule of thirds. The first is I like to have a plain, simple background with my focal point taking up 1/3 of the photograph (I call this the classic rule of thirds). That’s great for when I want a wide, expansive feel.
The other thing I like to do is set it up so that the focal point takes up 2/3 of the photograph both vertically and horizontally. That leaves you with a nice visual margin around the focal point. With the knitting taking up so much space, though, there’s no confusion as to what is the main purpose of your picture.
Use Overhead Shots Wisely by Framing with Intention

I like shooting pictures from overhead. I rarely do it so that my camera is perfectly parallel to the flat surface below, though. Mostly, this is because I find the phone lens distorts the image at the edges. It’s hard to get up high enough to correct for that. Still, though, the flatlay is popular for a reason, and there are ways to use it really effectively with your knitting.
Most important, you want to make sure that your props don’t compete with your knitting for attention. I’ve covered some of this in my post about setting up to take a good flatlay, but part of this is also addressed through framing your photograph. When you are setting up your picture and framing it through your camera, make sure that your knitting is dominant. There are a couple ways to do that.
One is to take advantage of the rule of thirds, which I’ve discussed above. This is a place where the 2/3 vertical and 2/3 horizontal strategy really pays off. I love using that strategy for flat lays, especially with a larger knit object.
The other strategy is to center your knitting with the props drawing the eye inward toward the middle of the photo. I like this strategy for smaller knit objects that would otherwise be overwhelmed by props.
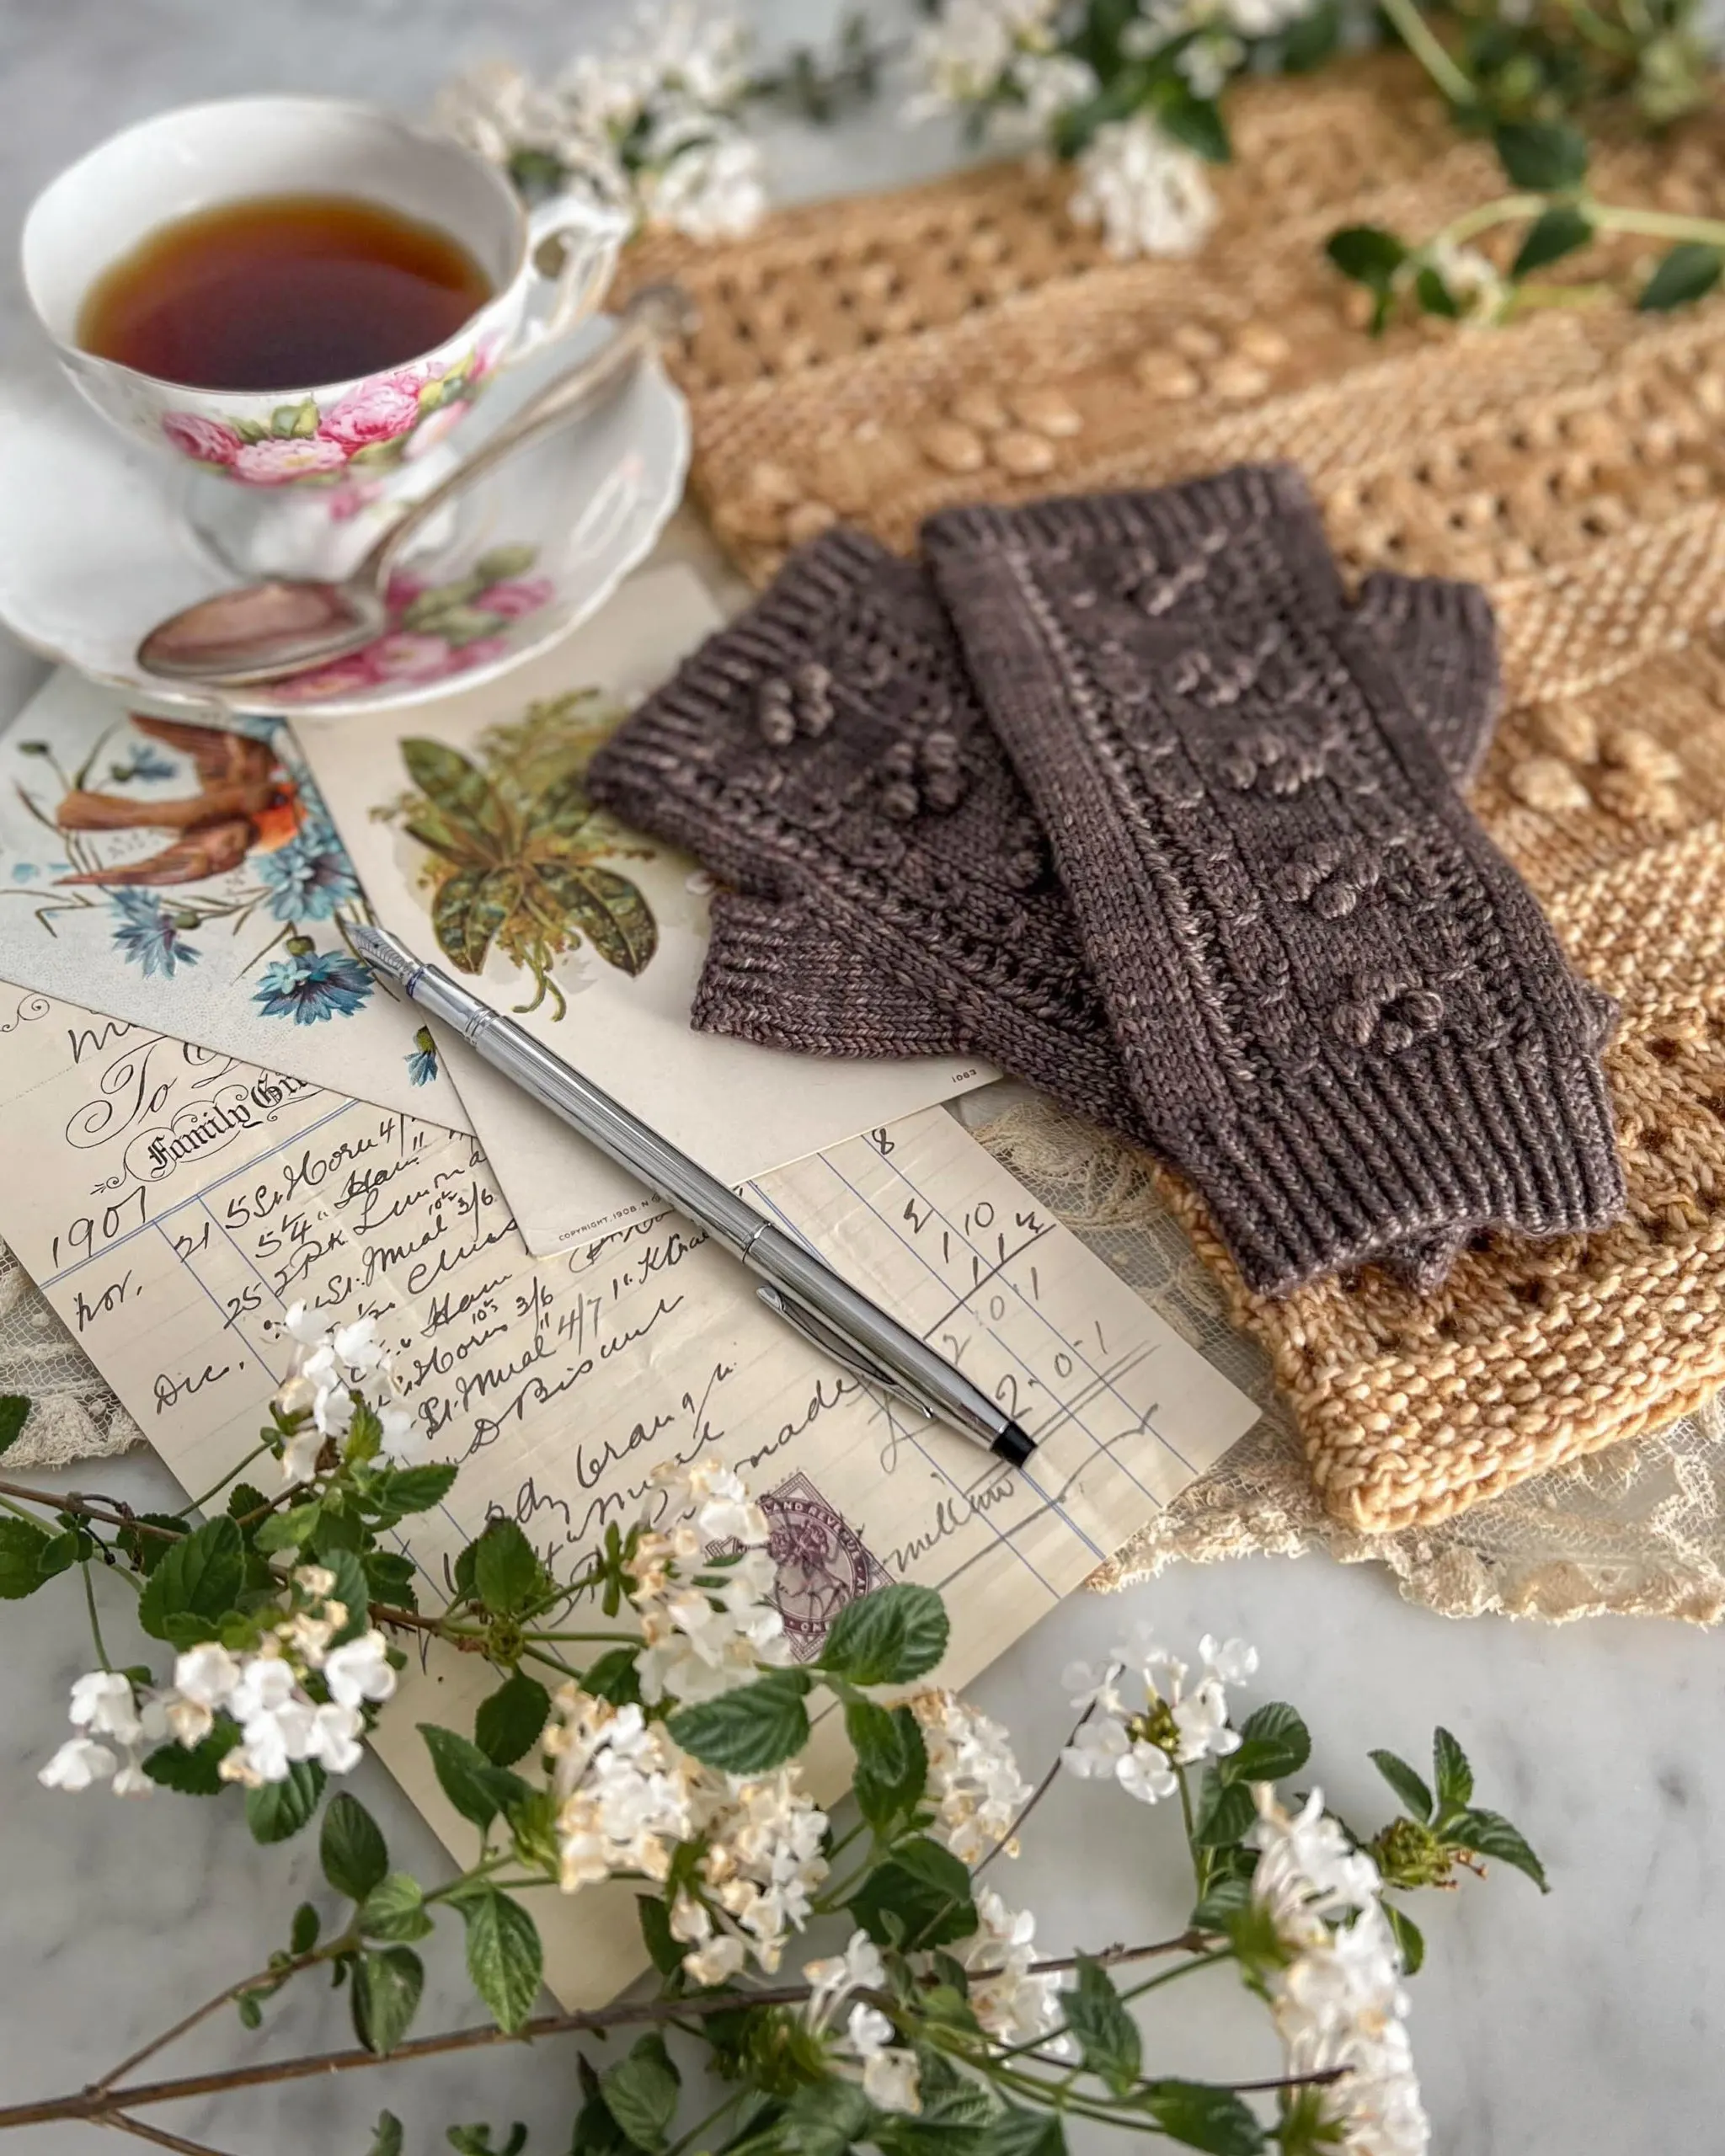
Take a look at the photo accompanying this section. The fingerless mitts are very small items that could be totally dominated by the larger props, but they’re not. That’s because I’ve set them up in the very middle. Then I framed the photo so the other items are not fully in the picture. Doing this makes the larger props feel a little smaller and keeps the focus on the knitting. Putting the mitts toward the front of the photo also helps. We’ll talk more about that in the next section.
Try Framing Your Photograph by Using Foreground and Background

I love using the foreground and background to emphasize what’s important in the picture. This is especially easy when using a DSLR, because it’s depth of field settings can be quite sensitive. However, it’s not difficult to do with your phone, either.
In your phone’s camera settings, swipe over to portrait mode. When you are ready to take your picture, frame it so there is something in the foreground and something in the background. Your knitting, which is the focal point of your picture, will be emphasized in the middle. Tap on that part of the picture to help your camera on your phone know that that’s where you want it to focus. Your camera will then blur the foreground and background to improve the focus on the knitting in the center.
I’ve included an example of what I mean in this section. Look at the pink socks and how there are plants in the foreground and background of the photo. You’ll notice the leaves at the front are a bit blurry, as are the leaves at the back. This draws the eye toward the part that’s in focus: the socks.
Bonus: Make Sure Straight Lines are Straight
The easiest way to make your photo feel like something’s off? Have it leaning in one direction or another. This seems obvious, but it’s one of the biggest issues I see in photos from knitters, and it’s something I still struggle with getting just right.
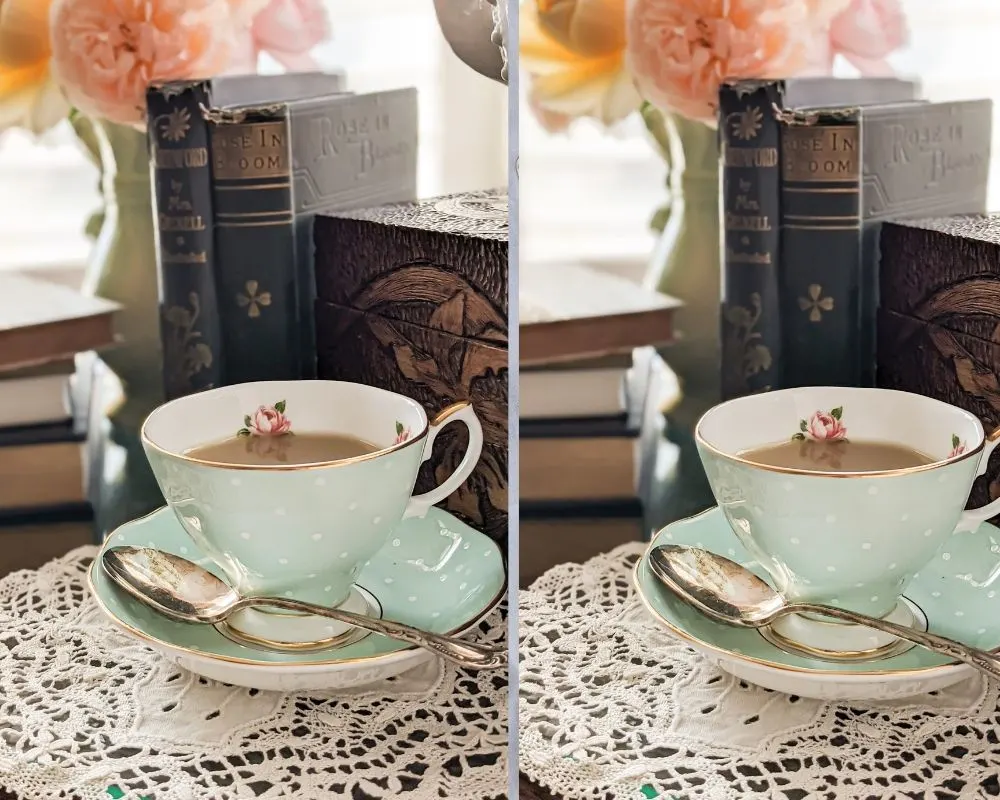
This isn’t so much an issue with photography on a flat surface, though you’ll want to make sure obviously straight lines (in my case, the lip of a teacup or the spine of a book) aren’t leaning so that the photo feels like the inside of a carnival funhouse. Here’s an example of what I mean. The photo on the left is a bit crooked, while the one on the right has been straightened.
When you’re photographing in a vertical environment, though, this issue can cause absolute chaos if you’re not careful. Walls, horizons, furniture, trees, light posts, and other features of the indoor and outdoor landscape are each an opportunity to make your photo feel just a little bit… off. They’re tiny trouble bombs.
But you can neutralize them easily! Remember the grid lines I talked about using about when following the rule of thirds? They’re useful for making sure your photo is straight, too. Use those lines to frame your picture so that straight lines are straight, not leaning. They’re good guides.
Don’t worry, though, if your photo turns out to be a little higgledy piggledy! You can fix that easily with some editing software, which we’ll talk about in our final installment in a few days.
Let’s stay connected!
Join my newsletter for 30% off all new releases, regular updates with helpful tips and tricks, first crack at registration for upcoming workshops, exclusive discounts, and more.
Join the A Bee In The Bonnet Facebook Group to participate in knitalongs and other fun community events
Come hang out with me on the A Bee In The Bonnet TikTok
Follow along on the A Bee In The Bonnet Instagram
Get inspired via the A Bee In The Bonnet Pinterest