One of the oft-repeated maxims of photography is that you need natural light. While that’s generally true, and I’ve written some about it here, it’s not the whole truth. Natural light is just the beginning, especially if you’re photographing knitwear in difficult lighting situations.
Today, I want to help you understand how to work with strong light, dim light, and light coming from weird angles. This is really important when photographing knitwear. That’s because the source of your light and the intensity of it can distort what your stitches look like. If your goal is to accurately capture your knitting, you need to understand how your light sources will interact with your stitch definition.
But first, a quick note: this post is one in a series of posts about ways to improve your knitting photography. Here are quick links to the other posts in the series.
Now, let’s get to it.
Photographing Knitwear with Dim Light Coming From a Low Angle
My favorite place to take pictures of my knitting is on my kitchen counter. I have a north-facing window and a west-facing window, so I get a lot of indirect, natural light in there. In the morning, though, the light is not good.
Take a look at these two pictures.
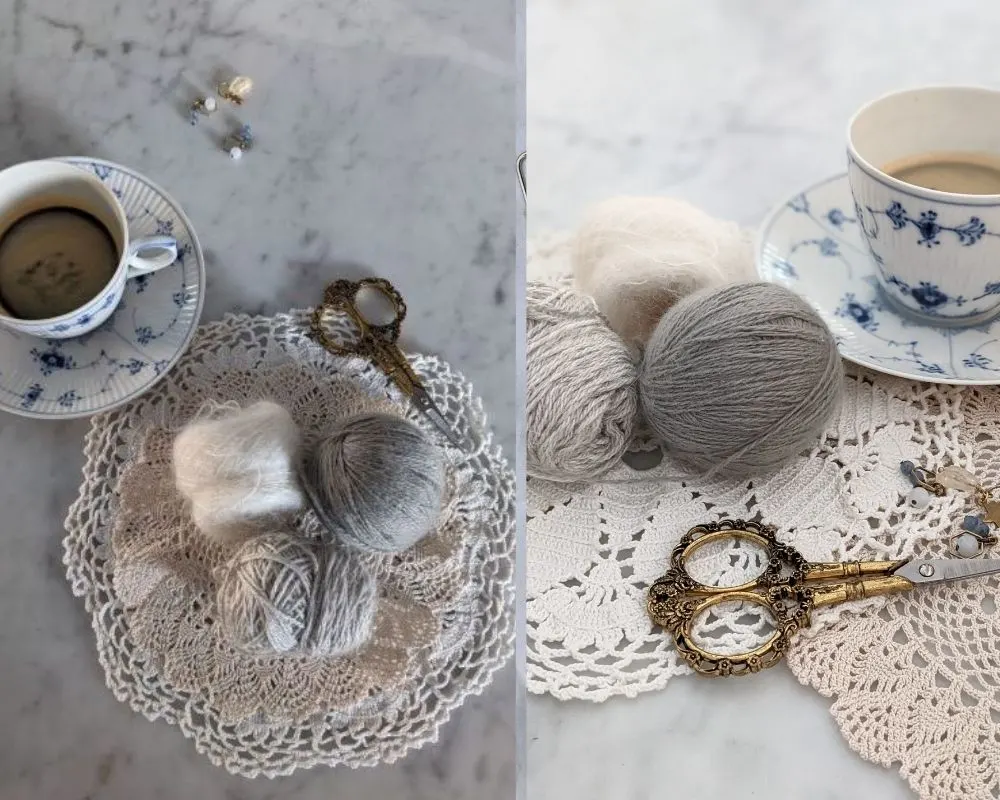
The first photo shows what the light looks like when I don’t do anything to change it. You can see the light comes in at a low angle. It also reflects a weird yellow glow off the fence in my backyard. That reflected light creates really strong highlights and shadows on the things in this picture. It’s also creating a weird, yellowish cast to the highlights.
If you look really closely, you can actually see there are shadows going in two different directions. That doesn’t just make it harder to see what’s happening in the photo. It also makes things kind of surreal and unsettling. Dali might be pleased, but I’m aiming for something a little more straightforward here.
This photo hasn’t been edited at all, in part because I wanted you to really get a look at the natural lighting conditions in this room. It’s pretty dim in the mornings.
Now look at the second picture. I took these pictures just a few seconds apart. The difference? I’ve set up barriers to protect the picture from strong rays of reflected yellow light through the windows.
This helps preserve the overall lighting of the space but diffuses it a bit. While it does create some dimness, this can be fixed easily with a photo editing app after I take the picture.
In fact, this second picture hasn’t been edited at all. The portrait setting on my phone takes slightly brighter photos automatically.
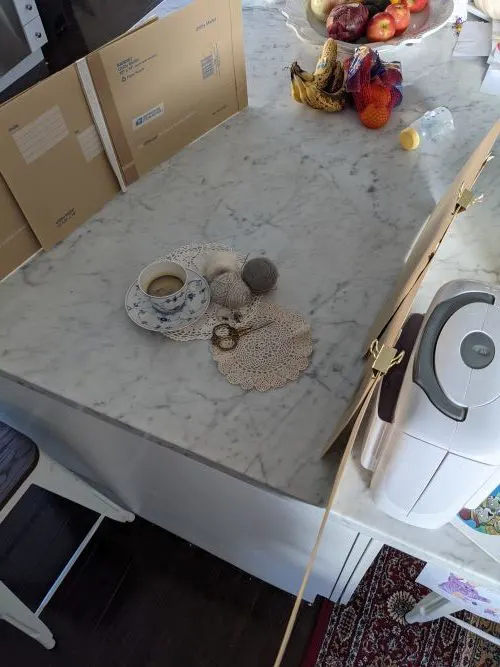
You don’t need fancy pop-up shades or reflectors to block light that’s too strong. In fact, the solution is rather low-tech.
This third photo is a pulled-out look at my setup. Yep, those are large mailing envelopes binder-clipped together and balanced against random supports.
See? Nothing fancy here. But it gets the job done, and that’s what matters most.
Again, this photo is unedited because I want you to really see what the light looks like in this room. It’s not perfect. You don’t need perfect light for a good photo.
Working with Dim Light on a Cloudy Day
When I did my initial survey of knitters‘ photography challenges, one of the most common issues people reported is dim light inside their homes and bad weather affecting the light quality.
If you have cloudy weather, that’s actually ideal for taking pictures of your knits. The clouds diffuse the light, and make it so that there aren’t strong shadows across your knitting. They just make it a little trickier to shoot indoors.
So if you’re having trouble taking photos indoors because you don’t have windows that let in much light or the weather outside is gloomy, my tip for you is to take your stuff outside. Bring a small, light-colored cloth to use as a photo background. That will help reflect what light you are getting through the clouds, and will brighten your picture overall. You will probably still need to do some adjustments using a photo editing app, but it’s always easier to edit from a good foundation.
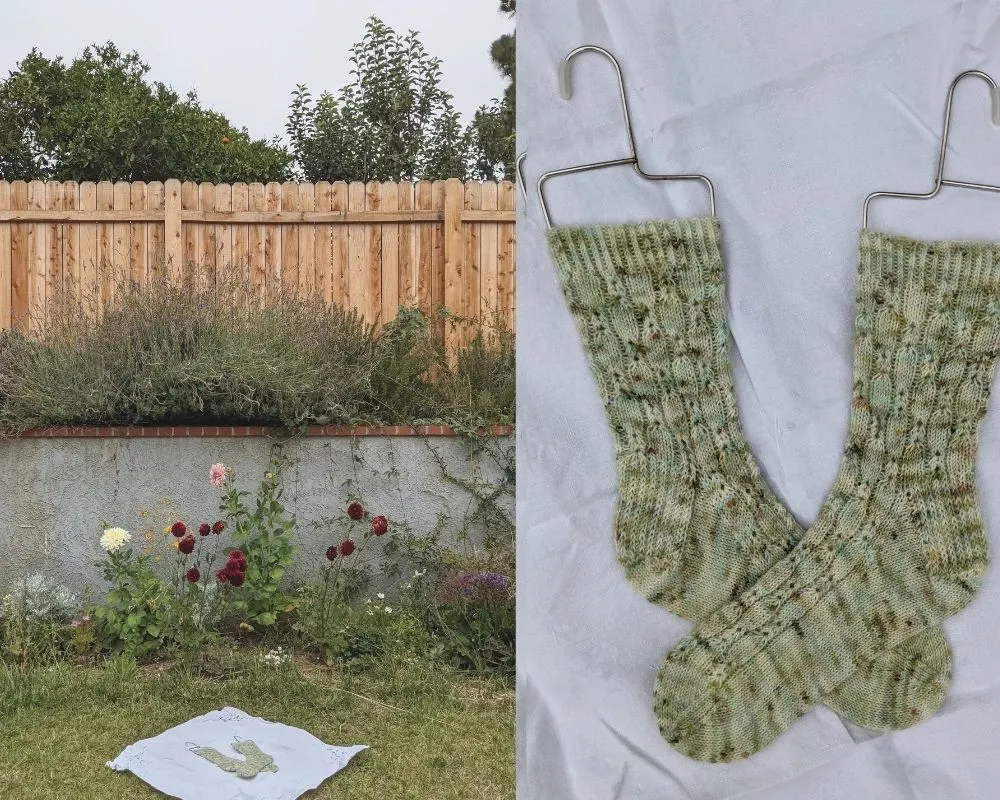
Take a look at this next series of photos. What you’ll see is my setup for taking pictures on a cloudy day. First is a pulled out shot showing that I’m just using a small tablecloth in my back garden. If you’re aiming to create a more elaborate flatlay, you’ll want to either set up on a flat surface like a patio or table, or bring out a large piece of cardboard or wood to lay under the tablecloth.
The second photo shows what this looks like shooting straight down. You’ll notice that there aren’t any shadows, not even from my body. That’s because of the clouds diffusing the light. I actually have the sun directly behind myself, and if This were a clear day, there would be pretty strong shadows across this set up.
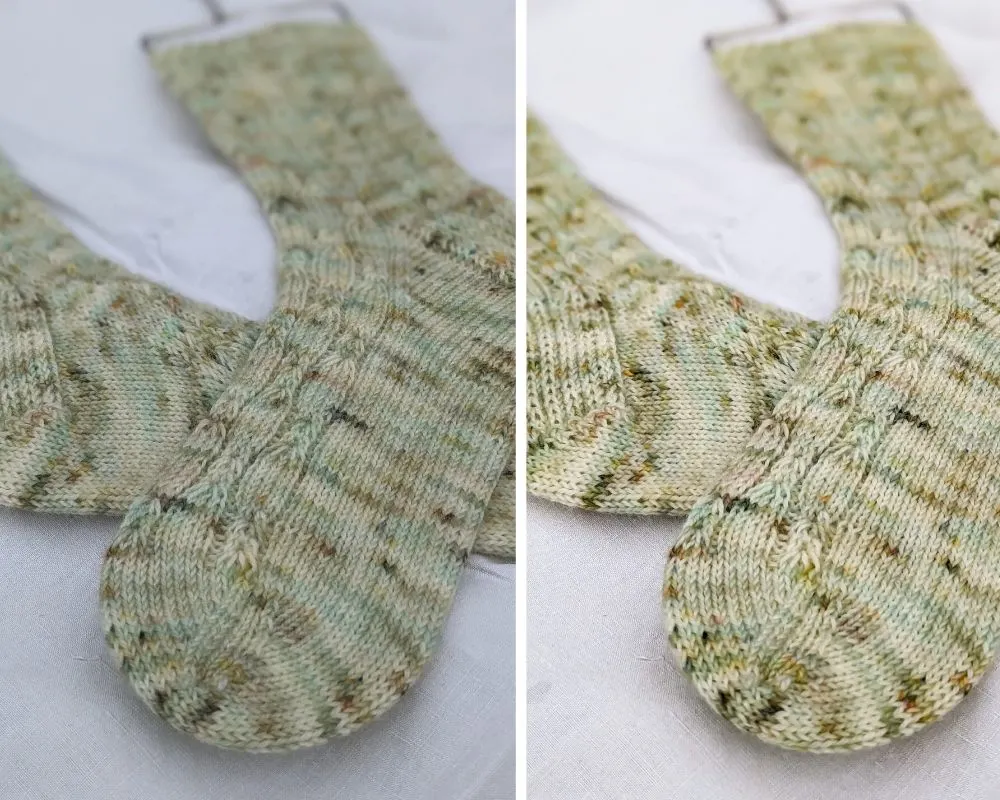
The third photo shows what a great detail shot you can get using just the portrait setting on your phone. The final shot shows what can be done with just a little bit of editing afterward.
Photographing Knitwear in Harsh, Direct Light
I live in Southern California, so my biggest challenge when photographing knitwear outdoors is not bad weather but rather weather that’s, ironically, too good. See, when it’s a bright, clear day, and the sun is directly overhead, you’re going to get some strong shadows across your knitting.
So if you don’t have great lighting indoors for taking your pictures, but the lighting outdoors is too strong for good pictures, what do you do? it takes a little bit of wrangling, but the solution is still cheap, low-tech, and relatively easy. Here’s what I do.
I bring out a large white tablecloth or sheet. If you don’t have one, you can pick one of these up at a thrift store for very cheap. Then, I use a couple patio chairs to drape the sheet over. What this white sheet does is diffuse the light without distorting color. Diffusing the light helps soften the highlights and shadows.
Then, I set up my photograph underneath my little canopy I’ve created. It’s important, when you’re setting this all up, to think about the position of your body relative to the sun when you’re taking pictures. If you are photographing with your back to the sun, you may end up with shadows from your body darkening the photo. Plan ahead so you can avoid that issue.
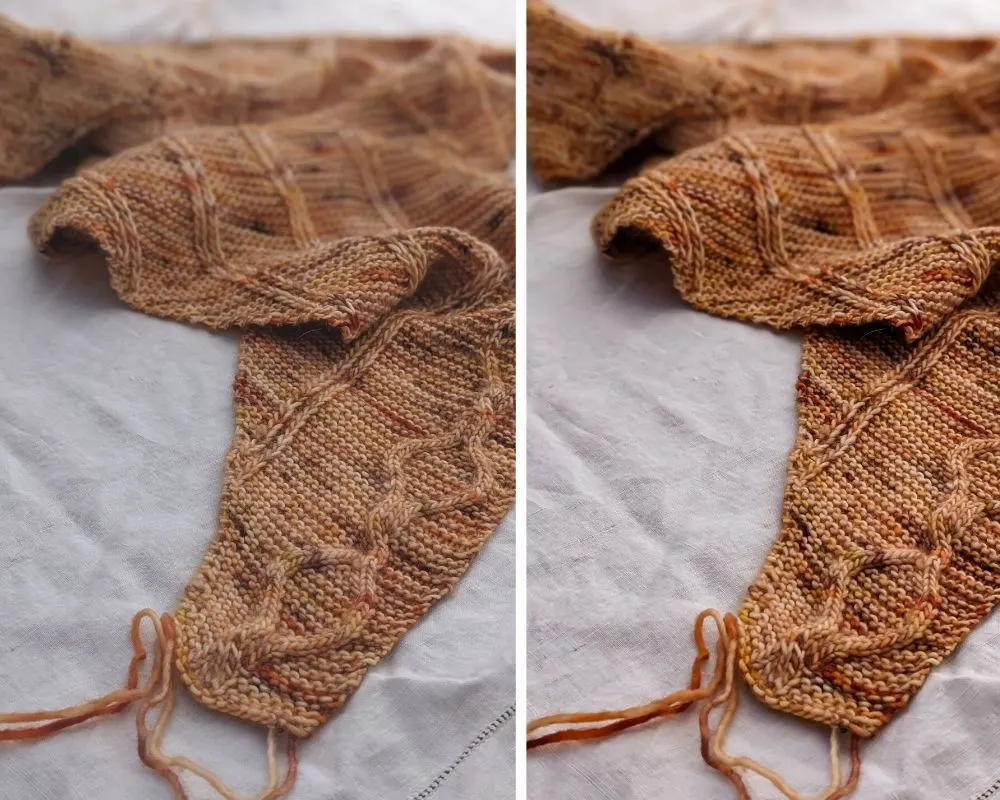
Take a look at these two pictures. I took the first photo without any shield from the sun. You’ll see that the highlights are almost painfully bright to look at, while the shadows are really stark. The second photo shows my set-up to filter the light a little.
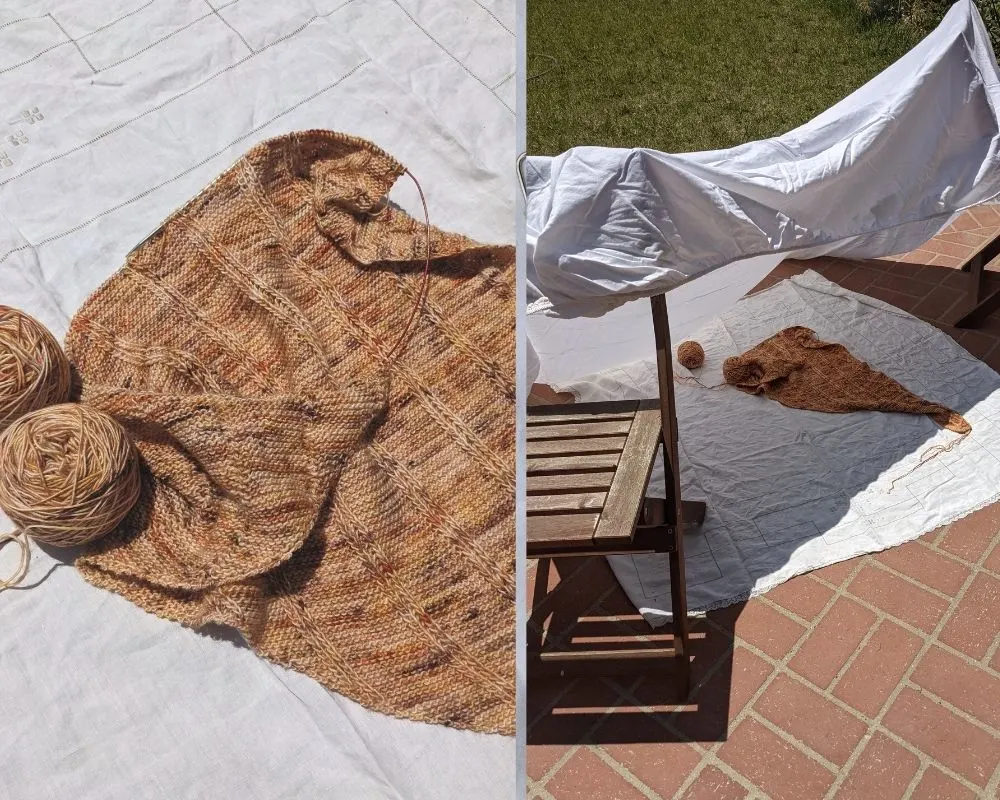
Now take a look at the next two photos. You can see that the shadows are significantly diminished, so you can more easily see what’s happening with the stitches. The second photo shows how it looks after a little editing in Lightroom.
This gets a little trickier when photographing people, but if you have some clips or ropes, you can use your sheet to set up a higher canopy that will give them a little shade. This might mean you’ll need to scout out a photo location that has good spots for hanging your sunshade.
I’ve mentioned photo editing a few times in this post. Don’t worry, we’ll be talking about that soon! But before we get to that point, we have a few more things to cover in the set-up stage of your photos. Up next: image composition. Stay tuned!
Let’s stay connected!
Join my newsletter for 30% off all new releases, regular updates with helpful tips and tricks, first crack at registration for upcoming workshops, exclusive discounts, and more.
Join the A Bee In The Bonnet Facebook Group to participate in knitalongs and other fun community events
Come hang out with me on the A Bee In The Bonnet TikTok
Follow along on the A Bee In The Bonnet Instagram
Get inspired via the A Bee In The Bonnet Pinterest


I’m glad that I’m not the only one who uses cardboard and linen to dim and reflect the lights 😁
Definitely not alone! I am all about the photo studio I don’t have to pay for 😂